This is my final blog post for my ’66 Beetle Project. I want to share with you some pictures and a voicemail message from the person that purchased the car, Chris Vallone. You may have heard of him. Chris is well known in the VW community. He restores classic VW bugs, is the owner of […]
1966 VW Beetle Project - (Posts Displayed In Reverse Chronological Order)
2. 1966 Beetle Project – Sold – Bye Karl…
Posted: July 24, 2013 11:01 pm
The time has come. Karl was picked up today by the car hauling company to take him to his new owner in New York. I have no plans to get another aircooled project at the moment, but I do remember saying that the last time I sold an aircooled VW too. It was a lot […]
3. 1966 VW Beetle Project – Blaupunkt Radio Installed
Posted: June 28, 2013 5:54 pm
The radio is now installed (as of a few weeks ago actually). It looks awesome and is sounding great. I purchased the radio from a gentleman in the UK that restores these old radios. He did a fantastic job! The speaker was purchased from Wolfsburg West. Here’s a video:
4. After The Show – 1966 VW Beetle Project
Posted: May 19, 2013 11:00 am
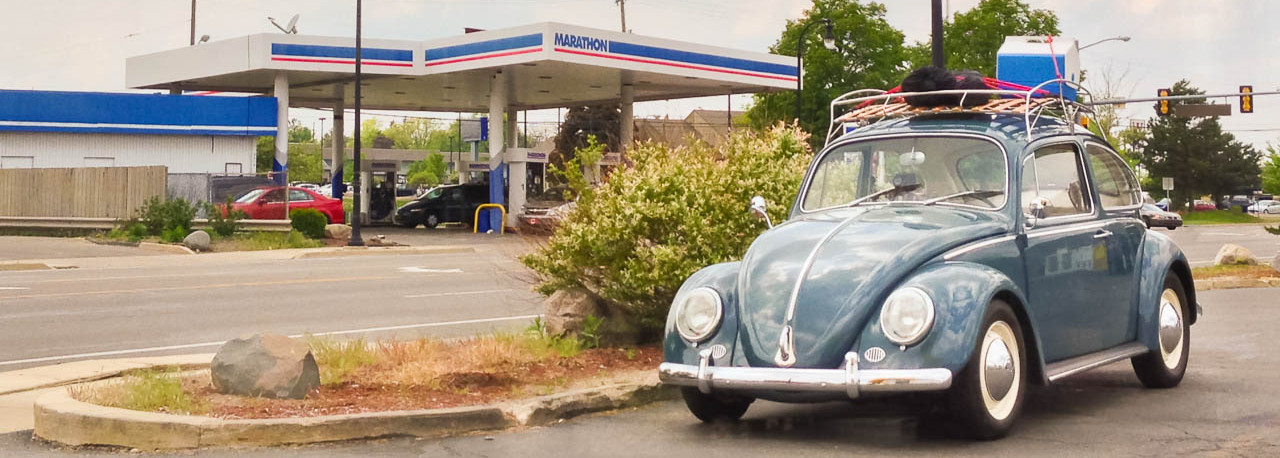
Stopped at Subway (or should I say “dub”-way) on the way home to eat lunch. Shot this picture of Karl from inside the store using my camera phone. I like how the red, white, and blue in the Marathon station signage matches the red bungie cords and blue/white cooler on the car. An unexpected surprise […]
5. MVVC Car Show Today – 1966 VW Beetle Project
Posted: May 19, 2013 10:24 am
The Michigan Vintage VW Club car show was today at Riverside Park in Ypsilanti, Michigan. The weather couldn’t have been more perfect for a car show. Here are a couple pictures I took of Karl under the gorgeous early morning light. Love that time of day! It was fun using the roof rack. Today was […]
6. Vintage Blaupunkt Radio – 1966 VW Beetle Project
Posted: May 15, 2013 10:02 pm
I bench tested Karl’s new radio this evening. I purchased it from a gentleman in the UK last year sometime. The good news is that it’s working great! Now if I only had a proper speaker for Karl’s dash, I’d have it ready to go for the car show on Sunday. I have the speaker […]
7. Initial Front End Alignment – 1966 VW Beetle Project
Posted: June 19, 2012 9:14 pm
Today I did the initial alignment (basically just the toe-in) on the new front end. I say “initial” because I plan to take it to a local vintage vw shop to have it done professionally too (I highly recommend it). I want it to be fairly straight/solid before I drive the car over to their […]
8. Installing Stock Front Beam – 1966 VW Beetle Project
Posted: June 17, 2012 1:39 pm
Now that my beam is complete (click here to read about that), it’s time to install it to the car. I’m lacking some good pictures in parts of this post. Sorry! First thing, lets get the rubber body pad placed on the beam. This will be sandwiched between the beam and body, once the beam […]
9. Building New Stock Front Beam – 1966 VW Beetle Project
Posted: June 14, 2012 8:15 pm
Today I’m going to build my new stock front beam. This is a brand new stock beam, which I believe VW will be stopping production on in 2013. If you’re thinking of getting a new OEM stock ball-joint beam, then now may be the time to do it. First up, I need to install the […]
10. Replace Front Outer Bearing Race On Wheel Drum – 1966 VW Beetle Project
Posted: June 13, 2012 6:12 pm
While removing the narrowed beam, I inspected the bearings and races on the front drums. They weren’t too bad, but not perfect either. I decided now was a good time to replace them since it was all apart anyway. What follows hopefully illustrates how to remove/replace the race from a drum. To learn how to […]
11. Remove The Shockless 6″ Narrowed Beam – 1966 VW Beetle Project
Posted: June 9, 2012 2:29 pm
When I purchased the vehicle, I knew it had a shockless 6″ narrowed beam. Never having a narrowed beam before, I thought it would be fun to try it out. I knew that if I didn’t like it then I could switch it out for a stock beam at some later time. Well, the time […]
12. Door Panels & Moisture Barrier – 1966 VW Beetle Project
Posted: June 6, 2012 1:17 pm
Now that the door mechanics are all installed, it’s time to install the door panels and moisture barrier. The moisture barrier is a good idea because the interior door panels are made of hard cardboard (much more durable than a cardboard box that’s for sure). The first thing I did was go down to the […]
13. Door Glass, Regulators, Scrapers, Vent Frames Installed – 1966 VW Beetle Project
Posted: June 5, 2012 6:09 pm
Except for the inside door panels, the doors are now complete. Sweet! Here are a few pictures:
14. Install Lifter Channel On Door Glass – 1966 VW Beetle Project
Posted: May 30, 2012 5:21 pm
I replaced the lifter channel on the driver side door glass today. The one I had was in bad shape, so I figured I should replace it. It can be very difficult to install the lifter channel on the glass, if not impossible to do with just your bare hands. Here’s how I did it […]
15. Vent Window Frames Back From Koch’s – 1966 VW Beetle Project
Posted: May 24, 2012 5:01 pm
I’ve been looking for some good/used vent window frames for the car. Ends up you can’t buy new reproductions for 1965-1967 Beetles. You can buy them for every year up to 1964, and every year after 1967, but not 1965-1967. Very strange to me, considering these 3 years encompass some of VW’s highest production years. […]
16. Seat Covers Installed – 1966 VW Beetle Project
Posted: May 13, 2012 4:23 pm
So, the seat cover issue is finally resolved. It ends up that TMI changed their templates a couple of years ago for the ’66 Beetle so that they would fit more snugly. Two things could have happened with my issue from March 30th, 2012. 1) Wolfsburg West had some old stock on their shelves, and […]
17. License Plate Bracket & 3M Tape – 1966 VW Beetle Project
Posted: May 1, 2012 7:30 pm
My license plate arrived yesterday, and finally got around to installing it today. I found another use for the 3M paint protection tape that I used on the door sills too. See a previous post about my door sills by clicking here. I used the 3M Paint Protection Paint on the back of the license plate […]
18. Inaugural Drive Around The Block – 1966 VW Beetle Project
Posted: April 21, 2012 9:00 pm
Today was the day! I took “Karl”, the name of my Beetle, on his first drive. I worked out a couple of kinks in the process too. When I’d turn left, the horn would beep. LOL! Also, 3rd and 4th gears were not reachable. Both issues were quickly fixed once I got back. Here are […]
19. Fuel Tank Fuel Filter – 1966 VW Beetle Project
Posted: April 18, 2012 7:00 pm
Ok, so I bought 3 stock copper mesh fuel filters from 2 different places… A local import auto parts store and Wolfsburg West. For the life of me, I could not get either one to install properly into the tank. Of all things, you wouldn’t think a stock fuel filter would give you so much trouble. The […]
20. Rear Breast Plate Engine Tin – 1966 VW Beetle Project
Posted: April 16, 2012 7:00 pm
I acquired a “correct” 1966 1300cc rear engine breast plate from a local guy. Willy wasn’t able to find a “correct” part when building the engine, as it is a one year only part and very hard to find. I was shocked I actually found one locally. They’re even hard to find online. The person […]
21. Added Windshield Wipers Today – 1966 VW Beetle Project
Posted: April 15, 2012 7:00 pm
It’s amazing how just adding windshield wipers can make a car look more like a car…
22. Body Trim Installed – 1966 VW Beetle Project
Posted: April 14, 2012 8:00 pm
I installed the chrome body trim (actually stainless from Wolfsburg West) today, as well as the VW emblem on the hood. It’s looking great! Here are a few pictures of the car with the trim installed.
23. Interior Shot Through Rear Window – 1966 VW Beetle Project
Posted: April 14, 2012 4:51 pm
It’s comin’ along, slowly but surely…
24. Engine Install – 1966 VW Beetle Project
Posted: April 7, 2012 9:58 pm
The day has come to install the new engine in the Beetle. Wow, it’s nice to finally be installing it. My Dad came down for the weekend (he lives in Northern Michigan) to help put the engine in. You may recall that the engine was built by Willie Page last fall and picked up from him […]
25. Stainless Steel Body Bolts Installed – 1966 VW Beetle Project
Posted: April 6, 2012 4:39 pm
I installed some stainless steel body bolts and body bolt plates today. No sense in doing all the work on the chassis/pan, and then have the body bolts rust out on me. I found/purchased the body bolt plates from a company in the UK called Volks Bolts. The plates are very well made, and look GREAT! […]
26. Battery Hooked Up To Electrical Today For First Time – 1966 VW Beetle Project
Posted: April 4, 2012 10:52 pm
Now that the wiring harness is installed, and hooked up properly, I decided it was time to hook up the battery to the system. Everything works great! I did notice the left turn signal flashes a bit faster than the right turn signal. Both front and rear bulbs are working on both the left/right side, […]
27. Seat Cover Issues – 1966 VW Beetle Project
Posted: March 30, 2012 3:46 pm
I purchased some seat covers for the car from Wolfsburg West. To save myself some time, I found a local upholstery guy to install them for me. He’s well versed in vintage VW’s and owns several actually. I received an email from him today with an update on the progress. He said, “The front seat […]
28. Replace “Main” Wiring Harness – 1966 VW Beetle Project
Posted: March 28, 2012 9:28 pm
I replaced the “main” wiring harness today. The wiring harness that was in the car got some over-paint on it while I was doing the undercoating of the car last summer. I should have removed the wiring harness before doing that, but I didn’t. Live and learn I guess. No one would really see the […]
29. Installed Starter, Horn, and Fixed Wiring – 1966 VW Beetle Project
Posted: March 25, 2012 8:54 pm
I mounted the starter motor today and also hooked up the horn. I temporarily hot wired the horn to see if it worked and it worked great! I love that VW Beetle horn sound… Meep meep!! I also went through every wire in the wiring harness to make sure it was all hooked up correctly. […]
30. Installed Solid State 12V Voltage Regulator – 1966 VW Beetle Project
Posted: March 24, 2012 8:12 pm
Today I installed a 12V solid state voltage regulator. It’s probably the ugliest voltage regulator I’ve ever seen. You’d think with today’s technology, they could have made it the same size as the original 12V non solid state voltage regulators. I plan to replace this with a non solid state voltage regulator in the new […]
31. New Engine Seal and Running Boards Installed – 1966 VW Beetle Project
Posted: March 23, 2012 7:59 pm
It’s been an unusually warm March this year, so I decided to get back to work on the Beetle. I had planned to work on the car during the winter time with my gas heater in the garage, but it just didn’t happen. Today I decided to install the engine seal in the engine compartment, […]
32. Engine Picked Up From Builder – 1966 VW Beetle Project
Posted: November 20, 2011 2:33 pm
I picked up the new engine from William Page (Willie) yesterday. Willie is the gentleman that built the engine for the car. I’m in Ann Arbor, MI, and Willie is in Lake Village, IL. It was a long drive, but well worth the trip. We got to stay the night in Chicago too, and it […]
33. Door Sill Protection Plates Installed – 1966 VW Beetle Project
Posted: November 9, 2011 10:00 pm
I installed my Wolfsburg West door sill Threshold Protection Plates this evening. It was a pretty easy job to do, and looks really sharp. I’ll start by showing you a picture of the finished product. (Click Images To Enlarge) The first thing I did was install some 3M Paint Protection Tape on the door sill. […]
34. Installed Carpet Kit and Rubber Floor Mats – 1966 VW Beetle Project
Posted: November 6, 2011 9:00 pm
I installed my new Wolfsburg West carpet kit this weekend. It isn’t a hard job, but it takes some time. I used a product by 3M called Super Trim Adhesive. It comes in a spray can and works really well. I was going to use Weldwood Contact Cement, but decided the 3M product would be […]
35. Sound Deadening Material Installed – 1966 VW Beetle Project
Posted: October 29, 2011 9:00 pm
I got the rest of the sound deadening material installed today. You may remember from a previous post that I installed sound deadening material in the roof as well. The product I used is called RoadBlockR™ Sound Deadening by SoundproofCow. I also used a little bit of their 1″ thick Echo Absorber™ – Natural Blend product for […]
36. Seat Frames/Springs Restored – 1966 VW Beetle Project
Posted: October 13, 2011 9:00 pm
I got my seat frame backs from State Of Mind Customs today. Wow, do they look GREAT! As always, State Of Mind Customs did a FANTASTIC job. Thanks John! The seat frames and springs on the car were in bad shape… Rusty, chipped, and just dirty with 45 years of dirt/grime. They were completely functional […]
37. State Of Mind Customs Shop Visit – 1966 VW Beetle Project
Posted: August 31, 2011 9:00 pm
I visited State Of Mind Customs today to see how the car was coming along. In one word, “WOW!” I’m extremely happy with the work that John and his team are doing on the car. I spent almost 2 hours with John going over things, although it didn’t seem that long. Just like when he picked […]
38. State Of Mind Customs – Pickup Day – 1966 VW Beetle Project
Posted: August 10, 2011 7:35 pm
John Bickel, owner of State Of Mind Customs, picked up the car this morning. John and his team are responsible for creating VW’s Max, the German accented shiny black 1964 vintage Volkswagen Beetle. In 2008, Max appeared in many VW commercials where he interviewed different celebrities including basketball coach Bobby Knight, supermodel Heidi Klum, Star Trek actor […]
39. Sound Deadening Material Added To Roof – 1966 VW Beetle Project
Posted: August 9, 2011 8:00 pm
I added some sound deadening material to the roof today, before the car gets shipped off to State Of Mind Customs tomorrow for the headliner installation (among other things). I’ll write more about State Of Mind Customs in future posts. I’ll add additional sound deadening material to the body once it comes home from State Of […]
40. Reattaching Body To Chassis/Pan- 1966 VW Beetle Project
Posted: August 7, 2011 10:53 pm
Today was the day! Dad and Joy came down this weekend for a visit. It was really nice seeing them. We put the body back on the chassis while they were here. It went so much faster with 3 of us working. Thanks Dad and Joy! =) The body basically went right back on in the […]
41. Body Gasket Installed – 1966 VW Beetle Project
Posted: August 5, 2011 10:22 pm
Got the body gasket installed. I used some clear silicone to hold it all in place. Small nails were originally used to secure this seal in place at the factory. I have a ton of clamps, which were really necessary to hold the gasket in place while the silicone was drying. Joan says, “You can […]
42. Brake Bleeding – 1966 VW Beetle Project
Posted: August 2, 2011 12:30 am
I bled the brakes today. I did this because I wanted to make sure the braking system was solid prior to putting the body back on (the brake lines haven’t had brake fluid in them since I owned the vehicle). I figured it would be easier to work on with the body off if anything was […]
43. Pedal Assembly, Master Cylinder, and Brake Lines Installed – 1966 VW Beetle Project
Posted: August 1, 2011 12:17 am
I reinstalled the pedal assembly, master cylinder, and brake lines today. Attaching the clutch cable to the clutch pedal is a bit tricky. While attaching the clutch cable to the clutch pedal and mounting the assembly to the tunnel, you’ll want a helper (Thanks Aly!) to keep the cable nice and taut by pulling on it from the other end of the […]
44. Master Series – Mastercoat Silver and AG111 – 1966 VW Beetle Project
Posted: July 31, 2011 10:28 pm
My mistake with the Master Series product was a pretty big setback (see previous post). I’m guessing it set me back about 20-25 man hours in total. Ouch! Live and learn, I guess. The final product is MUCH better though, and I’m happy the problem presented itself sooner than later. I would have been really bummed […]
45. Priming Underside Of Fenders Using Master Series Mastercoat Silver – 1966 VW Beetle Project
Posted: July 28, 2011 11:49 pm
Here are some “in progress” pictures of the undersides of the fenders. I’ve primed them using Master Series Mastercoat Silver Permanent Rust Sealer/Surfacer Primer (of course). One of the things I’m going to have State Of Mind Customs do is put a chipguard undercoat on the undersides of the fenders. I mentioned the chip guard […]
46. Master Series – What NOT to do! – 1966 VW Beetle Project
Posted: July 18, 2011 9:49 pm
I was so happy with the Master Series Mastercoat Silver Permanent Rust Sealer/Surfacer Primer and their AG111 top coat, that I decided to put it on the top of the pan too. There was a coating of a Wurth undercoat type product already on the top of the pan (installed by the previous owner) prior to […]
47. Final Coat Of MasterSeries AG111 High Performance Gloss Black Paint– 1966 VW Beetle Project
Posted: July 4, 2011 8:00 pm
I spent most of the day putting on the MasterSeries AG111. It is a two part urethane, and “besides automotive restoration, this paint has seen service in every conceivable hostile environment from wrought iron railings to the Pittsburgh Homestead High Level Bridge.” Two coats of the MasterSeries MasterSilver Permanent Rust Sealer Primer and one coat […]
48. Two Coats Of MasterSeries MasterSilver Permanent Rust Sealer/Surfacer – 1966 VW Beetle Project
Posted: July 3, 2011 8:00 pm
I had a pretty productive Fourth Of July weekend. On Saturday and Sunday I put on 2 coats of the MasterSeries MasterSilver Permanent Rust Sealer/Surfacer. This stuff is GREAT. It went on easily and really sealed everything up tight. 🙂 Tomorrow I’ll put on the MasterSeries AG111 final top coat. Here are some pictures from […]
49. Cleaning Under The Front Gas Tank And Spare Tire Area – Steel Wheel Brush & MasterCoat Metal Prep – 1966 VW Beetle Project
Posted: June 17, 2011 8:00 pm
I decided to clean under the front spare tire and gas tank area. It wasn’t as filthy as the rear luggage shelf area, but it certainly needed to be done. You’ll see there was a good amount of surface rust too. Here are some pics from the process: Here are the “Before” images… […]
50. Cleaning Under The Rear Luggage Shelf – Round 3 – Steel Wheel Brush & MasterCoat Metal Prep – 1966 VW Beetle Project
Posted: June 11, 2011 4:59 pm
Wow, it’s starting to look great. Today I started with a steel wheel brush on my electric drill to start removing the surface rust that was present. Once I was done with that, I used MasterCoat Metal Prep to remove the remaining surface rust. You’ll definitely want to wear rubber gloves, eye protection, and a safety odor mask for […]
51. Cleaning Under The Rear Luggage Shelf – Round 2 – Needle Scaler – 1966 VW Beetle Project
Posted: June 10, 2011 6:38 pm
Ok, we’re getting closer. I spent some time with the needle scaler today and got the rest of the undercoating (among other things) off the bottom of the luggage shelf. It’s starting to look nice and clean under there. 🙂 The other day I pulled some plastic shielding and really thin aluminum wrap off of the […]
52. Cleaning Under The Rear Luggage Shelf – Round 1 – Engine Degreaser – 1966 VW Beetle Project
Posted: June 8, 2011 10:10 pm
One of the reasons I wanted to remove the body from the chassis was to allow for easy access to under the rear luggage shelf. I don’t think it’s ever been cleaned under there (see images), thus it’s extremely dirty. It’s covered with 45 years of road grime, grease, and oil. Today I started by degreasing it […]
53. Body Removal – One Person – 1966 VW Beetle Project
Posted: June 5, 2011 10:31 pm
I removed the body from the chassis today. Here’s a short video showing the process:
54. Removed Fenders Today – 1966 VW Beetle Project
Posted: June 4, 2011 10:24 pm
I removed the fenders today. I want to undercoat them because they didn’t get painted when the previous owner had the car painted. Not sure why they didn’t get done (they were off the car when the car was painted). Even if it had been painted, I’d still want to put a very light/thin layer of chip […]
55. Fixed Hood Latch – 1966 VW Beetle Project
Posted: June 3, 2011 10:09 pm
I adjusted the hood latch today so that it actually works. It’s an interesting mechanism, indeed. It’s designed such that if the hood latch cable (the cable runs from the latch to the inside of the car) ever breaks, then it automatically unlocks itself. This prevents you from ever getting locked out of the front luggage compartment. =)
56. Giant Sawhorses – Body Removal – 1966 VW Beetle Project
Posted: May 29, 2011 10:03 pm
I made some giant sized sawhorses today to hold the body when I remove it from the chassis. There is some work I want to do to the body, and it will be way easier to do with it off the chassis. Wow, they *are* sturdy! STURDY! I think I could keep my Suburban body […]
57. Undercoating Removal – Part 3 – 1966 VW Beetle Project
Posted: May 23, 2011 9:39 pm
I continued removing the undercoating from the pan today. I’m pretty much done. I just need to remove the bolts that hold the body to the pan so I can use the needle scaler down through that channel where the bolts go. I need to order the Master Series undercoating primer and topcoat still. I have […]
58. Undercoating Removal – Part 2 – 1966 VW Beetle Project
Posted: May 22, 2011 9:30 pm
I stopped by Harbor Freight on the way home from the Michigan Vintage VW Club Annual Car Show to get the needle scaler air tool I mentioned in my previous post. I came home and tried it out. It works GREAT! I can’t wait to get all the undercoating off. Should be a quick job with this […]
59. Undercoating Removal – Part 1 – 1966 VW Beetle Project
Posted: May 21, 2011 9:19 pm
I started to remove the undercoating today. I used a steel brush wheel on my drill. It didn’t work all that great, but it did kind of work. It removed it, but it would also heat up at times and just smear the undercoating. I researched a better tool to use and found out about something […]
60. Beetle Delivered From California
Posted: May 17, 2011 5:03 pm
My new ’66 Beetle arrived from California today. =)