This is part 4 in a series about reducing heat loss in my Vanagon Westfalia. In this installment, I show the affects of insulating the rear hatch. A spot that I have always felt is drafty and cold when sleeping. Especially since I sleep with my head toward the rear hatch. If you haven’t read PARTS 1-3 in this series, then check them out here:
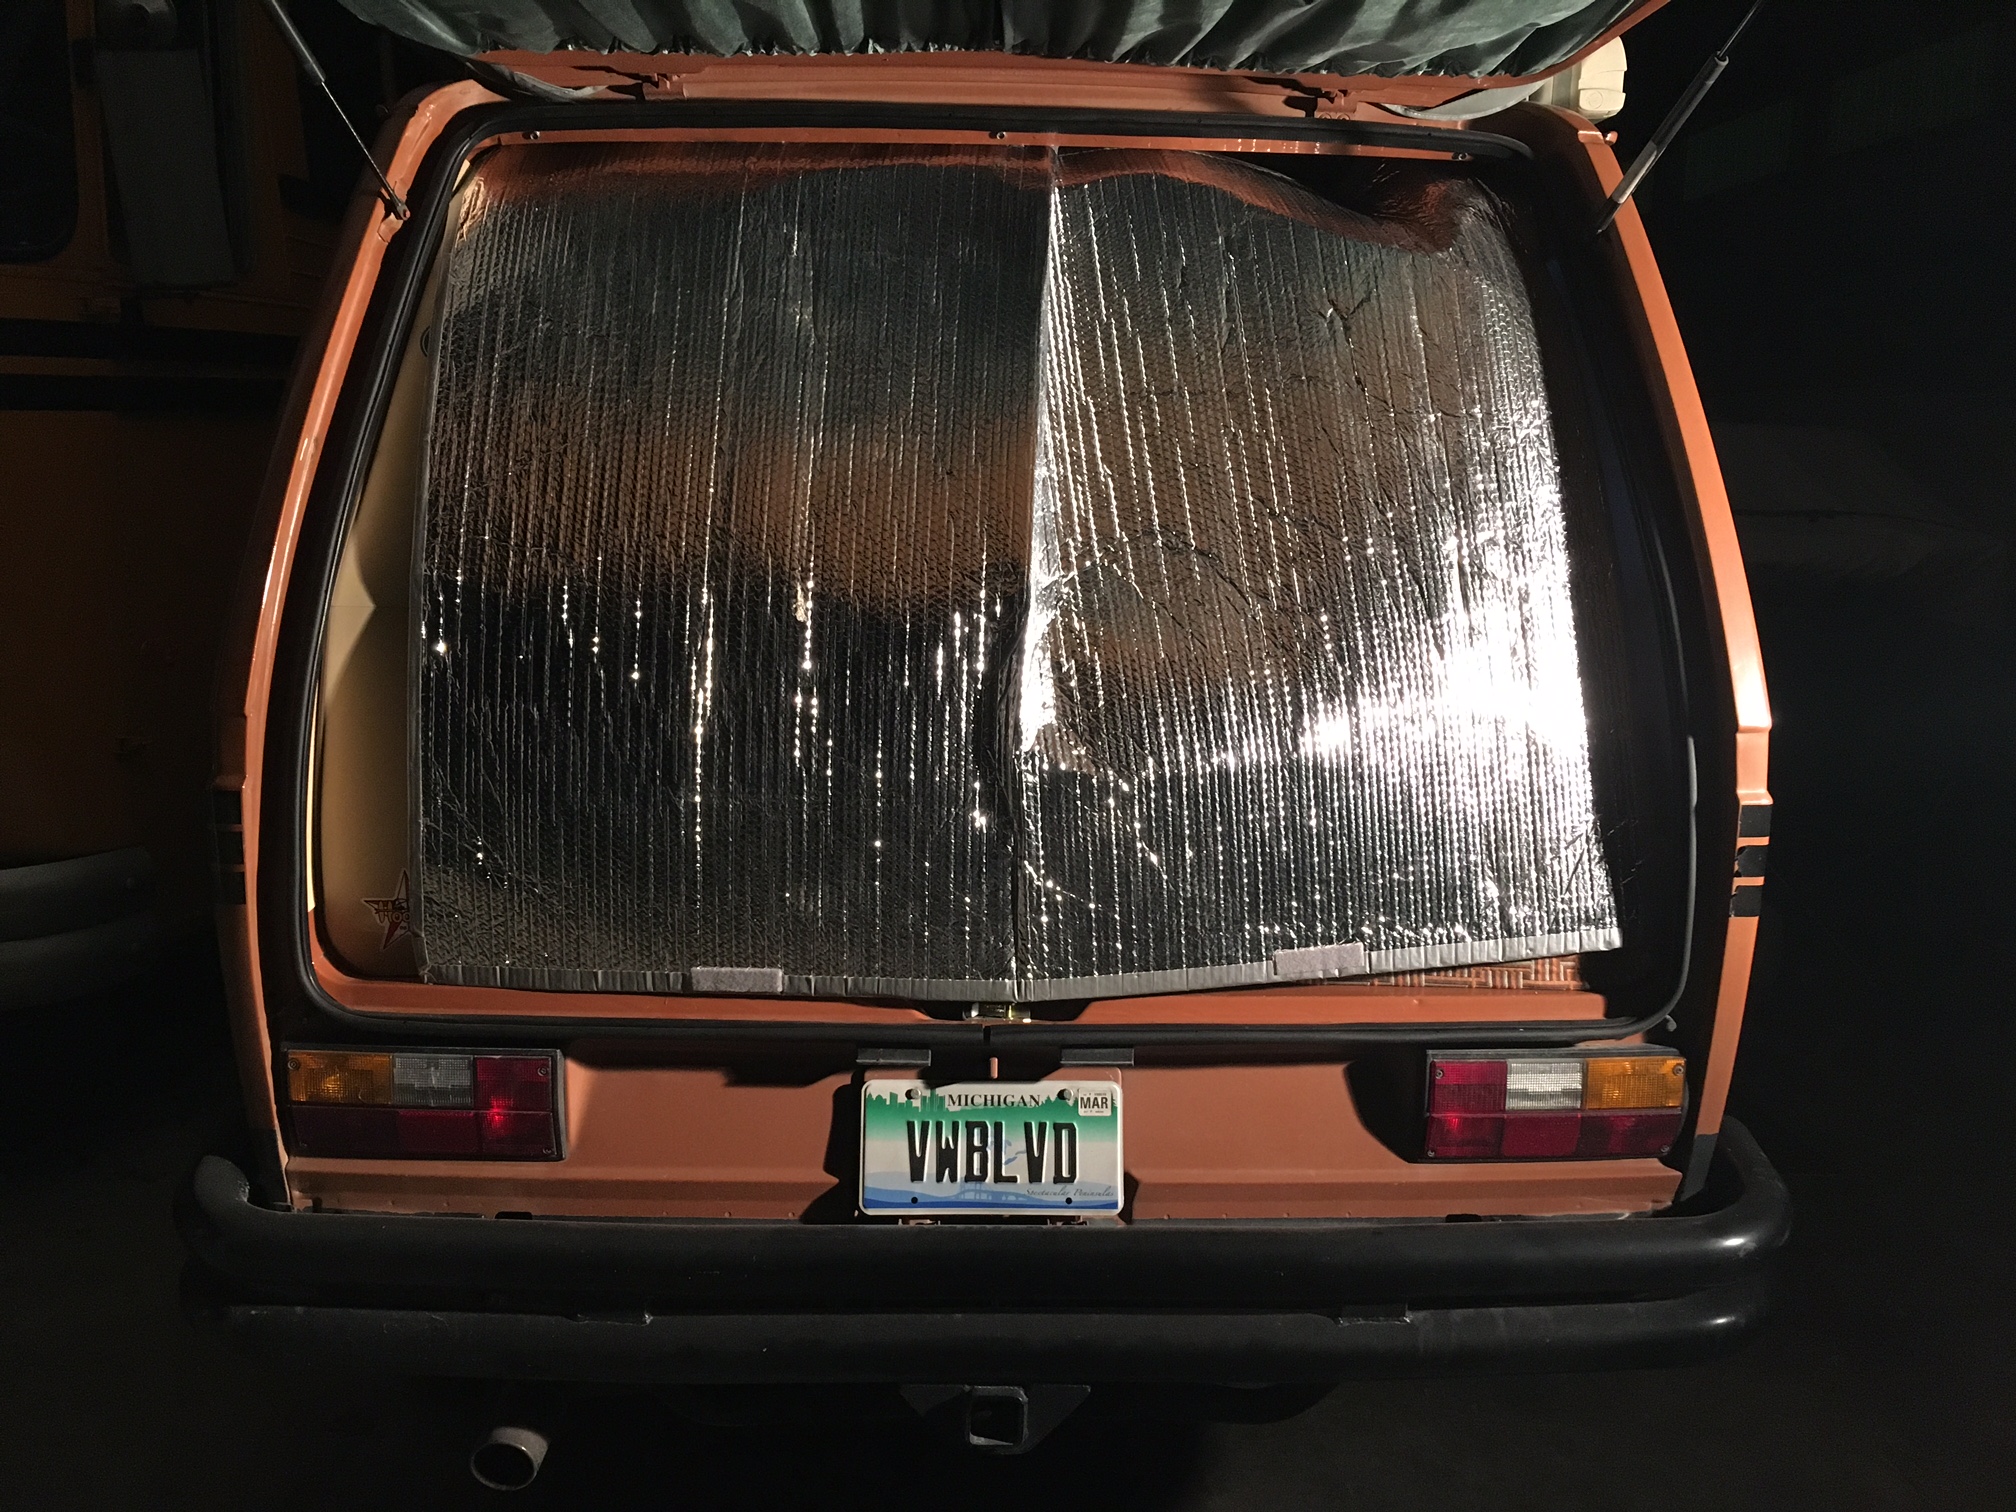
In this post, I test the Fanchers.com’s rear hatch thermal (yep, Fanchers again!). First, here’s a picture of the poorly cut piece of Reflectix that I’ve been using:
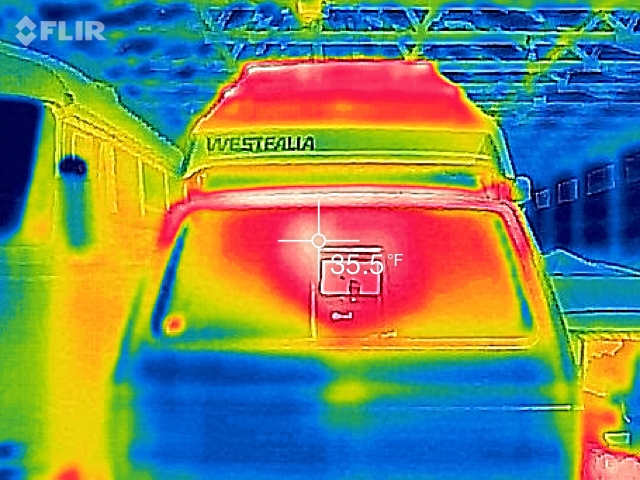
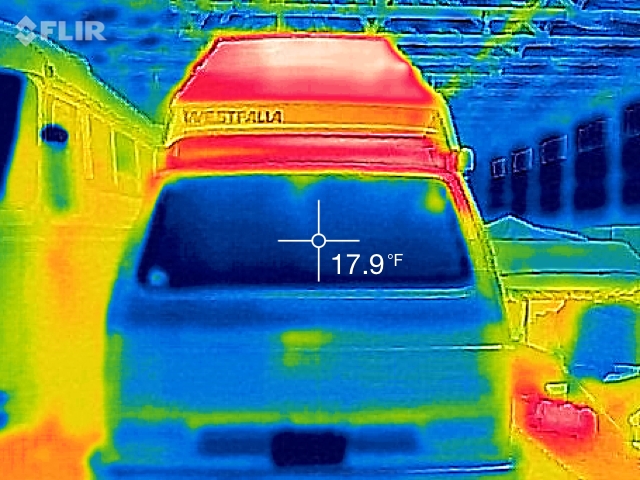
One can easily see why that would be drafty. It worked better than nothing, that’s for sure, but it was drafty.
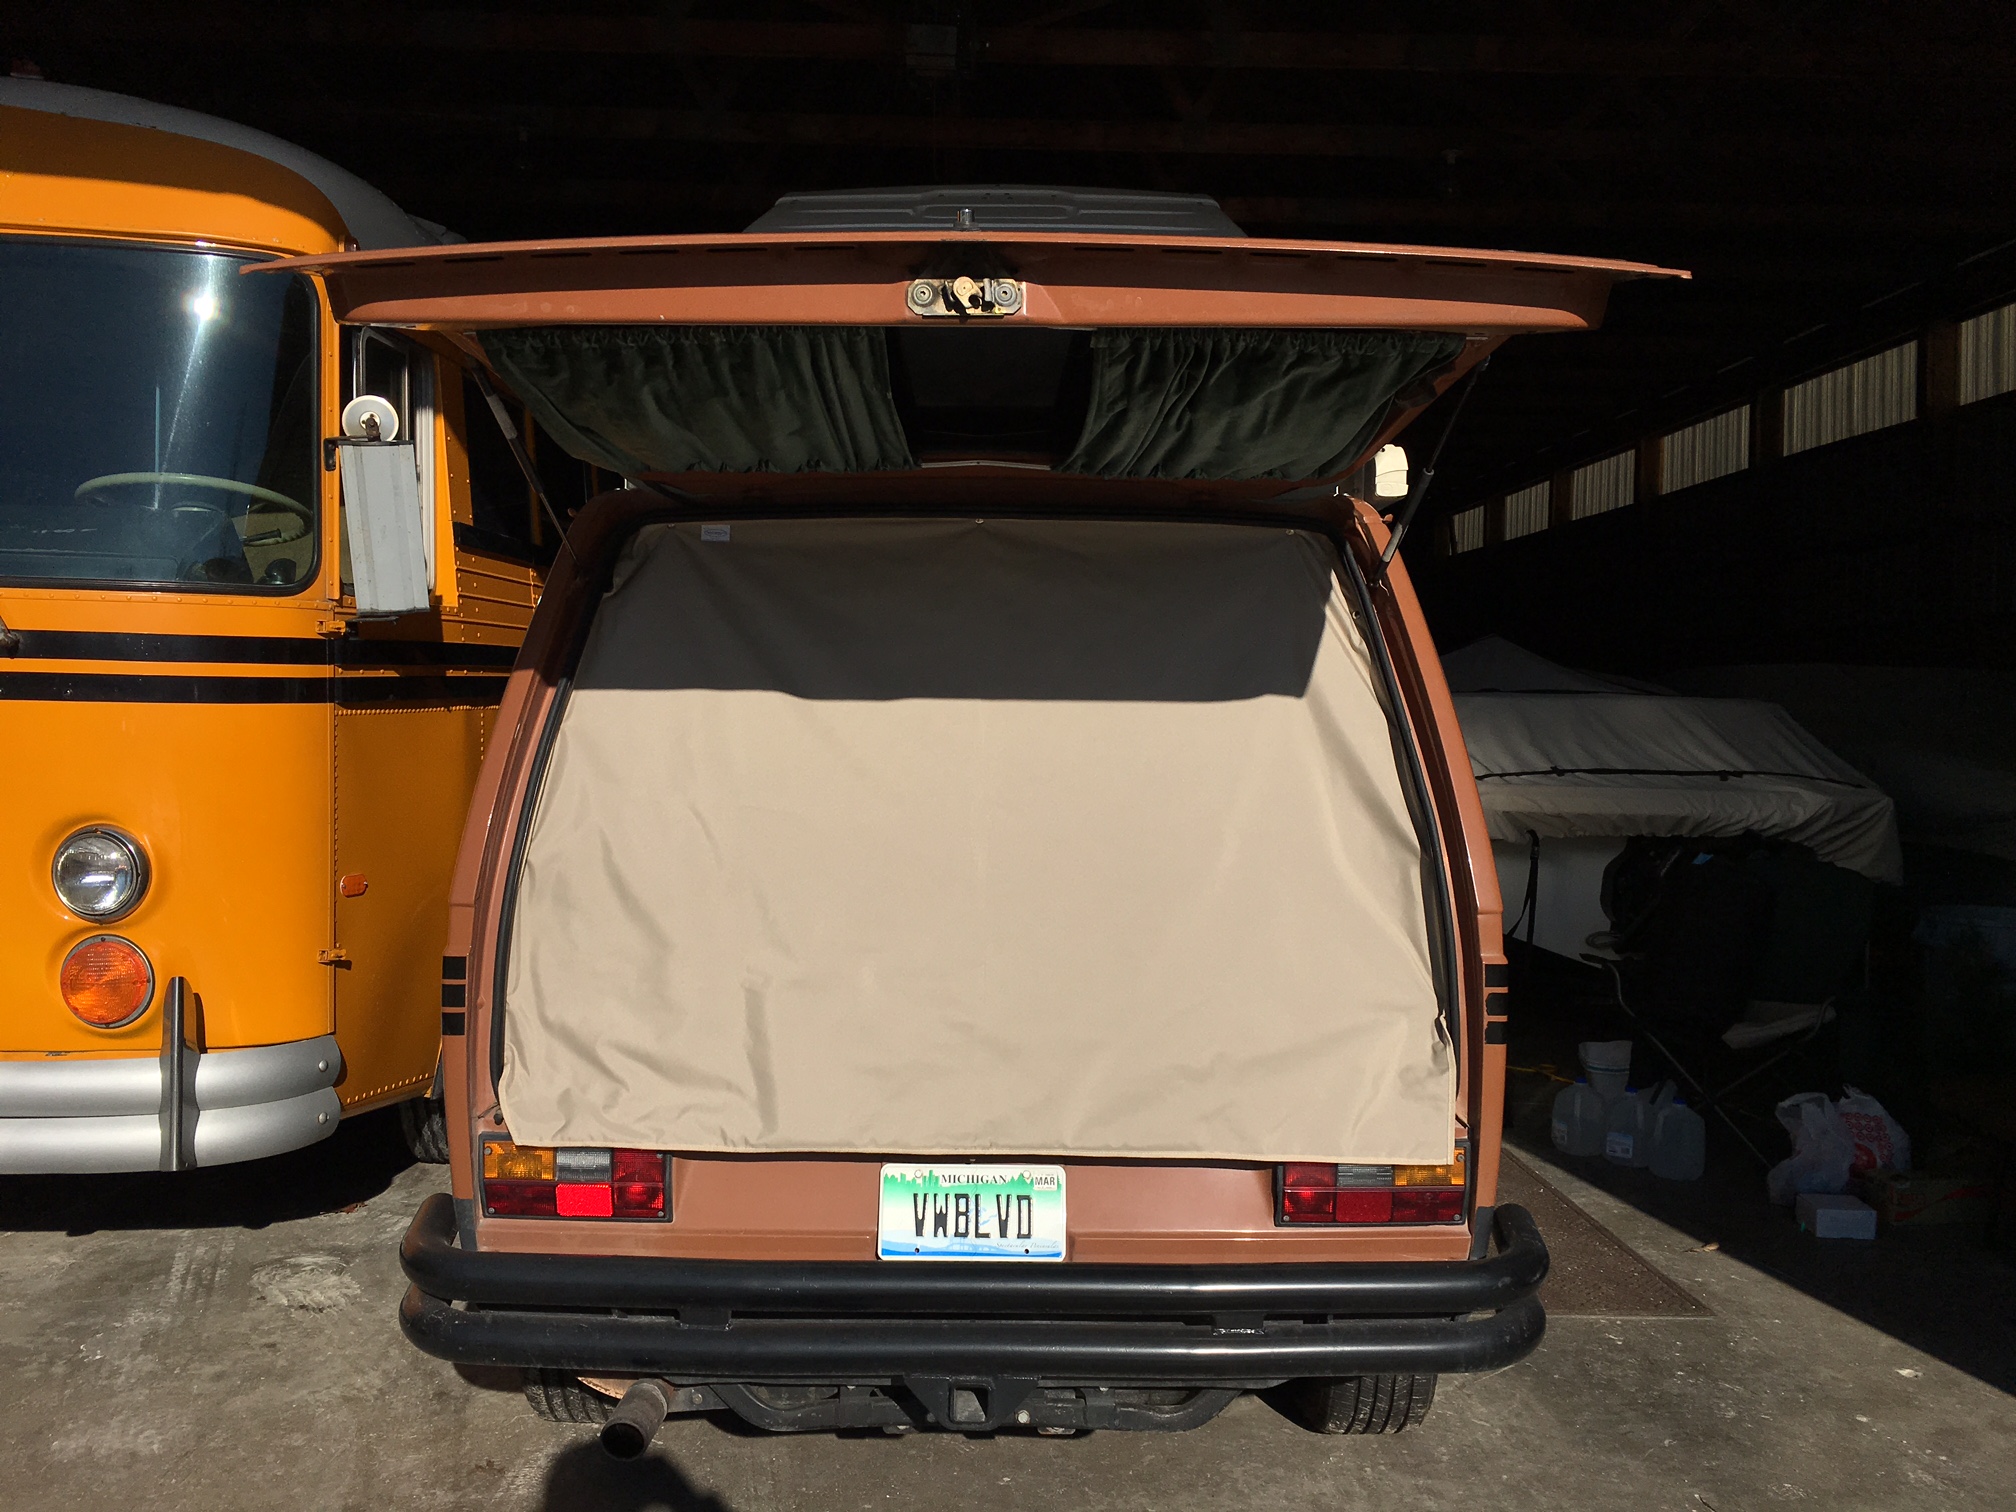
Here is a picture of the Fancher’s product installed. It’s a perfect fit, and snaps into the same snaps as the rear hatch screen. Installation is a “snap” (pun intended)!
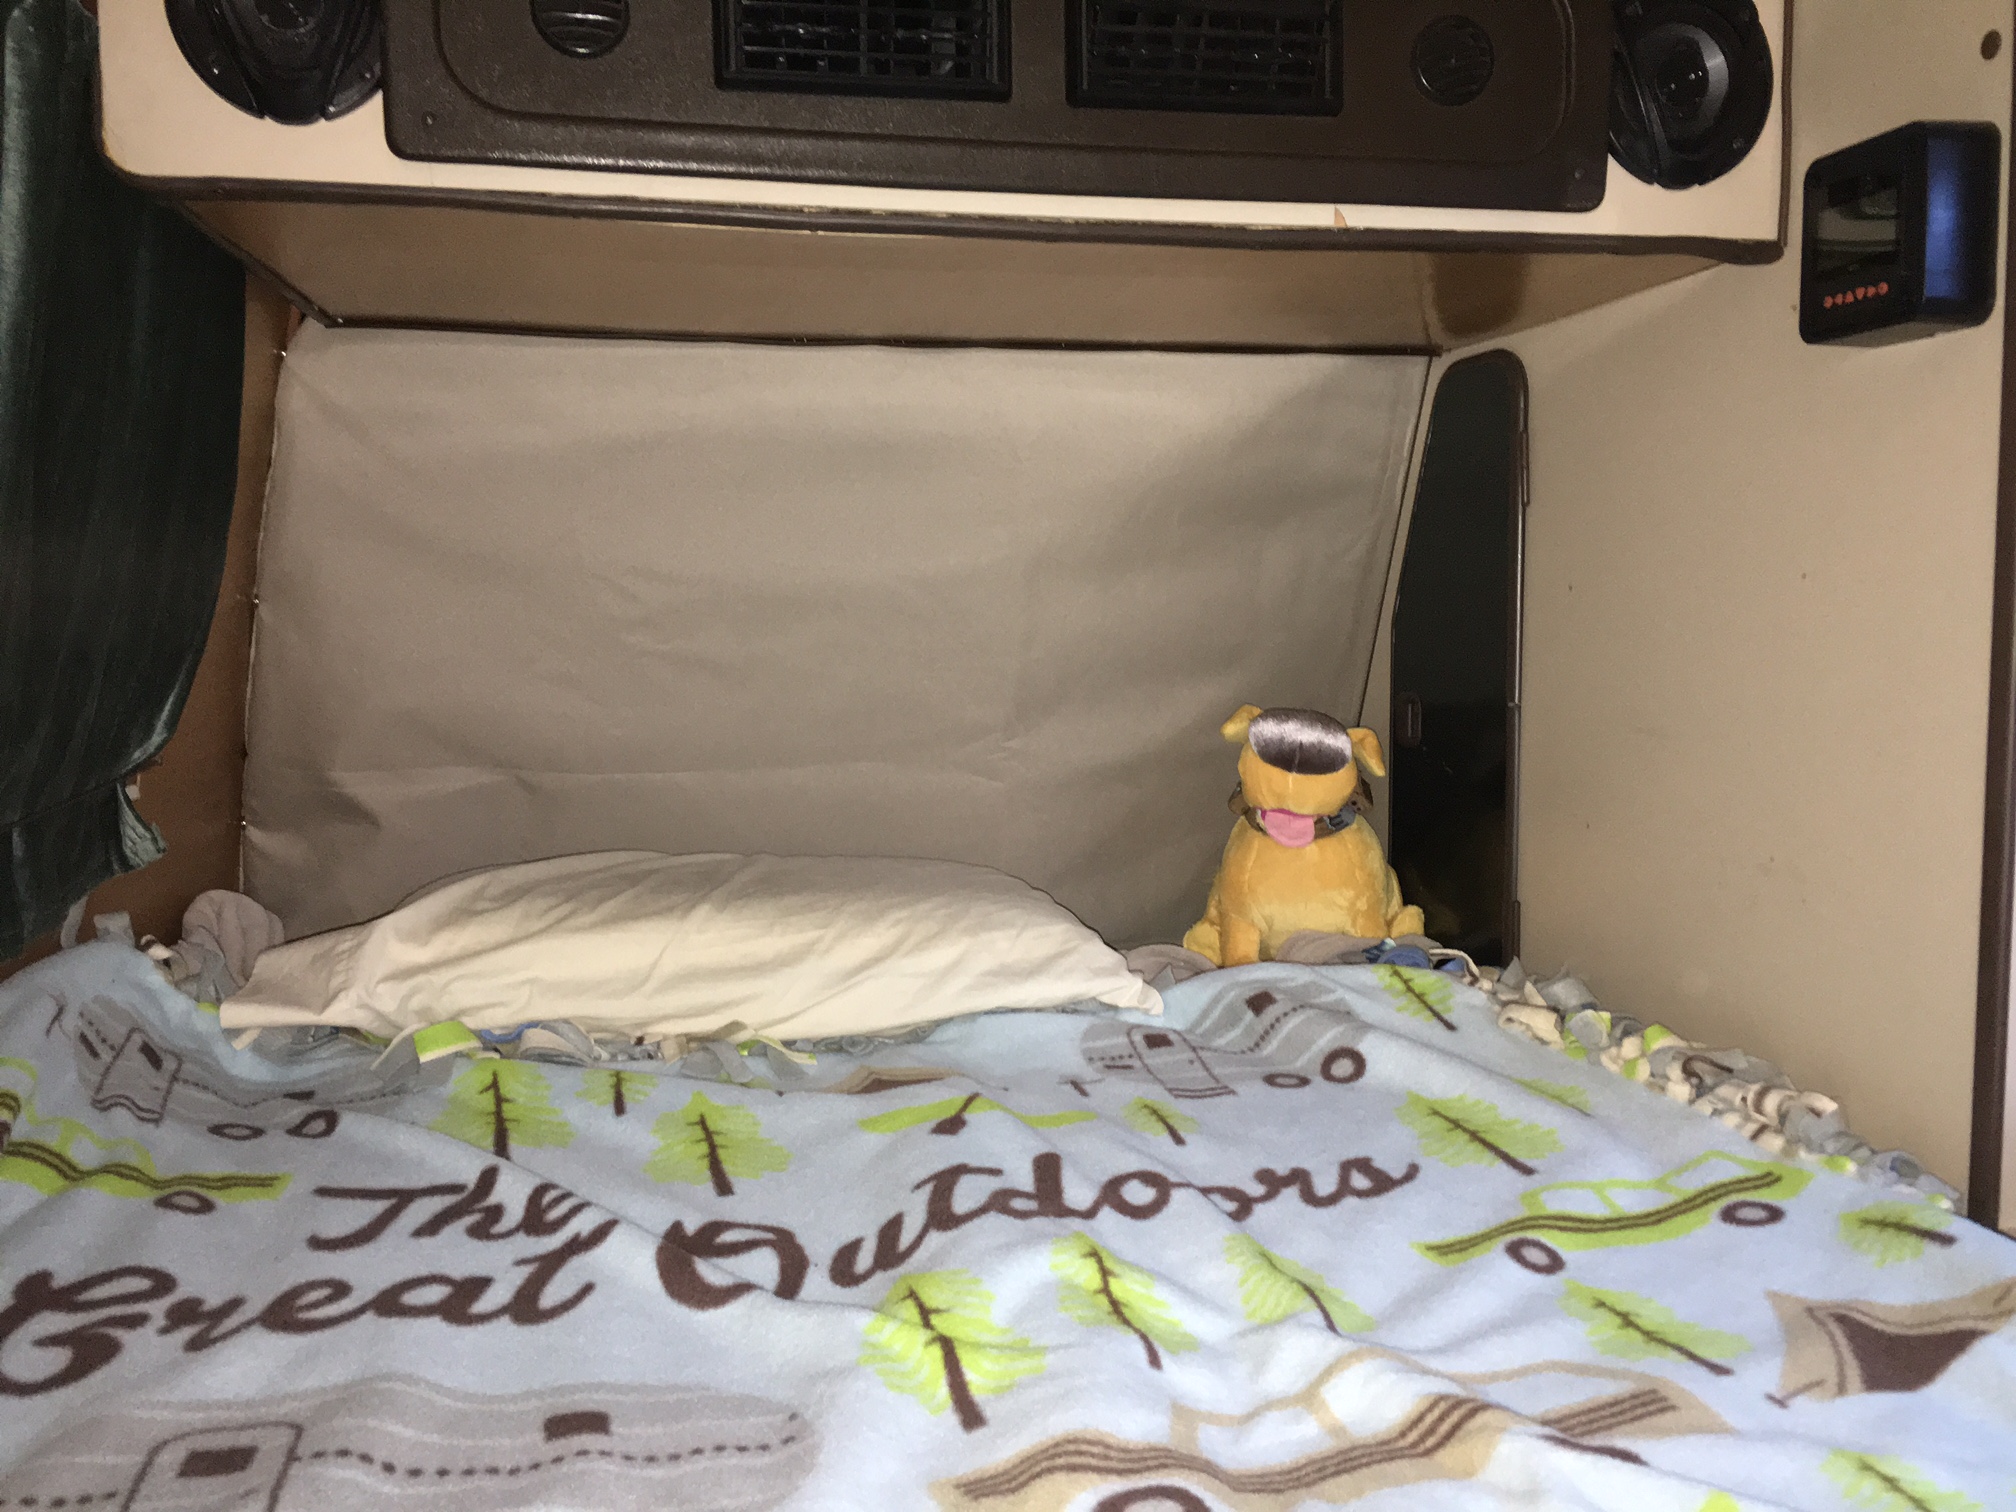
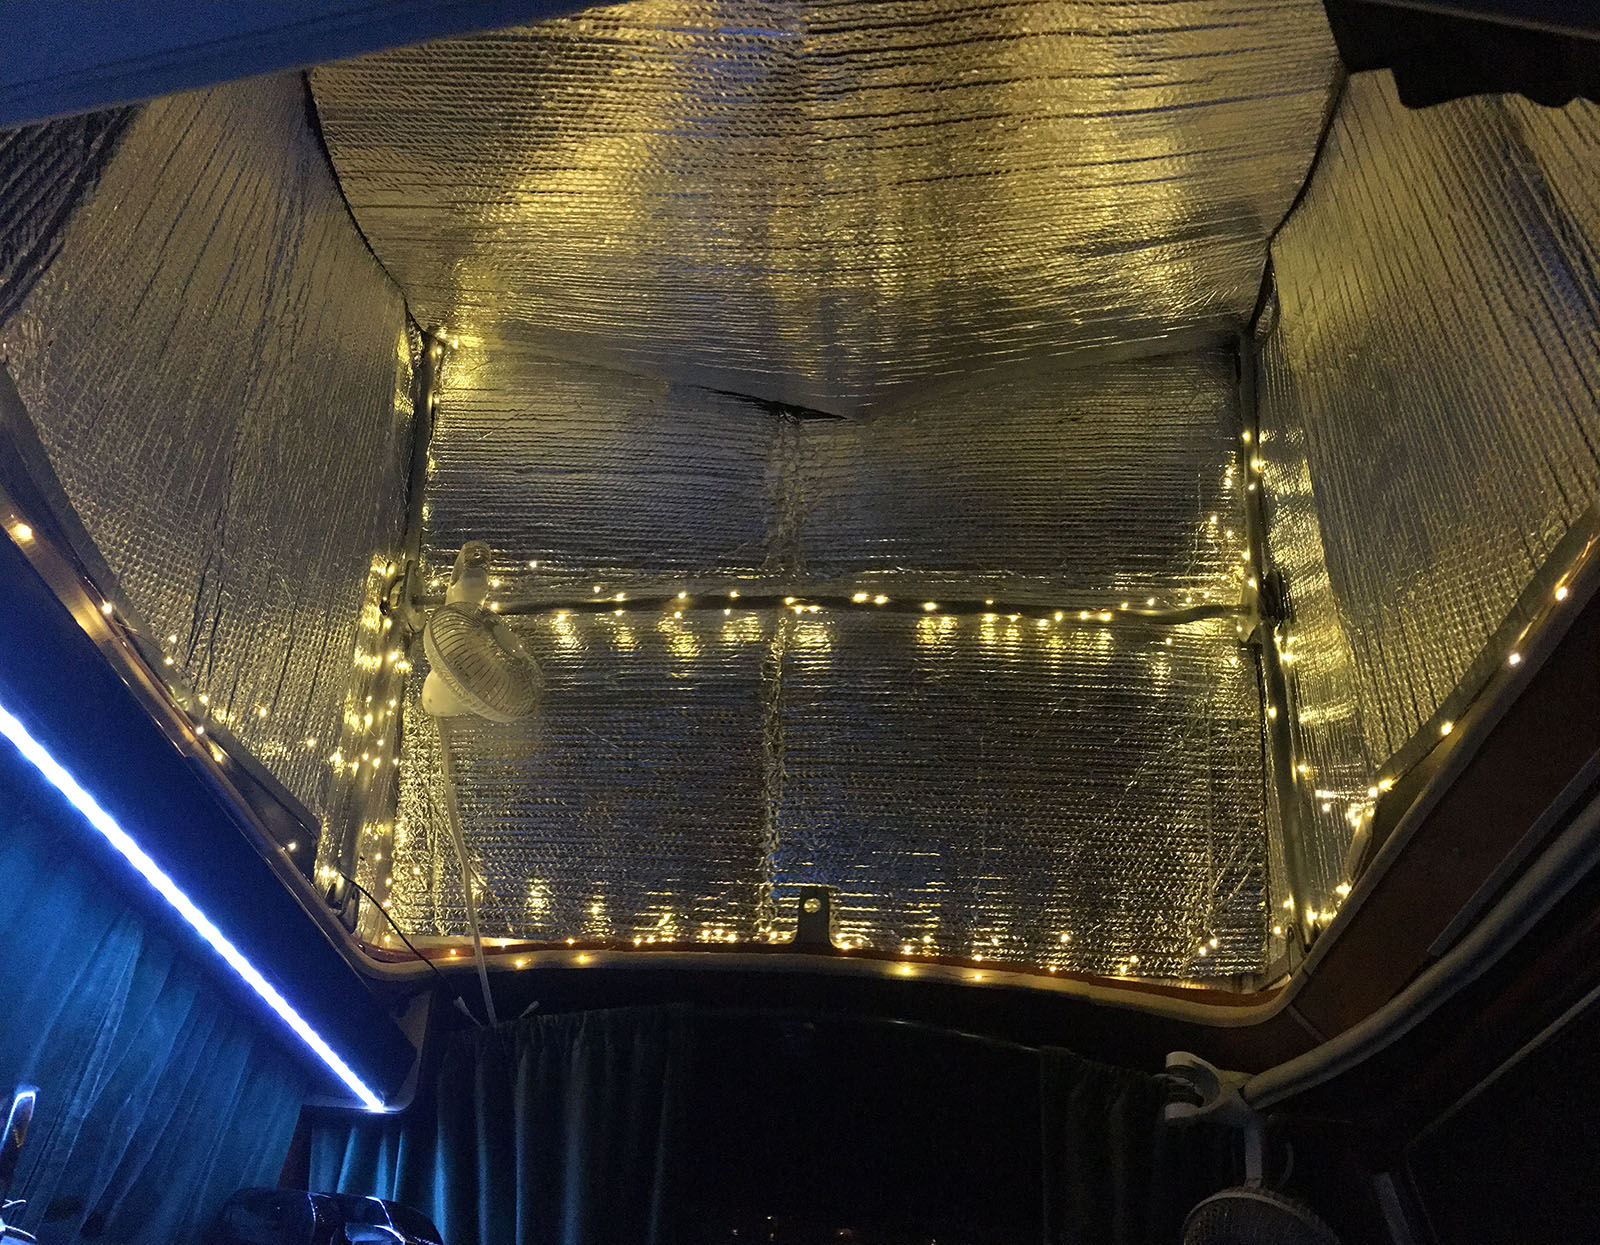
Here’s a view from inside:
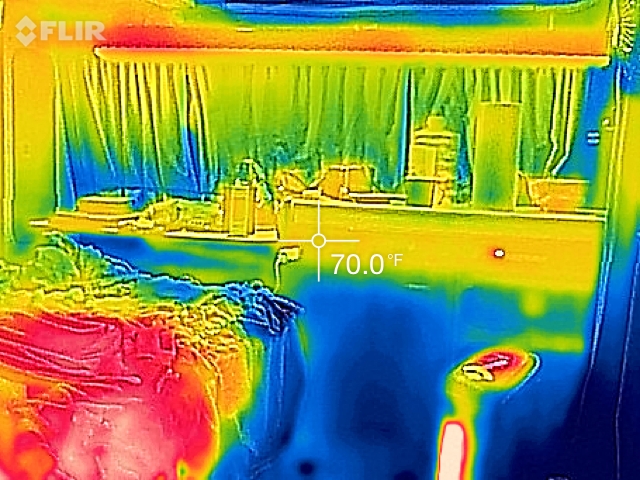
Like part 2 and 3 of this series, this test was done on the evening of December 31st, 2016. Actually, between 2am and 3am on January 1st, 2017. 🙂 I won’t post my baseline temperature pictures again, as those can be seen in part 2 and 3. I will state the temperature in the barn was about 29 degrees Fahrenheit, and the inside of the van was about 70 degrees Fahrenheit.
NOTE: Thinking back, I had the barn door open for a while when these pictures were taken, and the back of the van is just a few feet from where the door is when closed. I didn’t take a thermal temperature reading of outside, which I probably should have done. It was later in the evening too, so the temperature probably dropped a bit (probably closer to 20 degrees Fahrenheit outside by this time). Let’s get started!
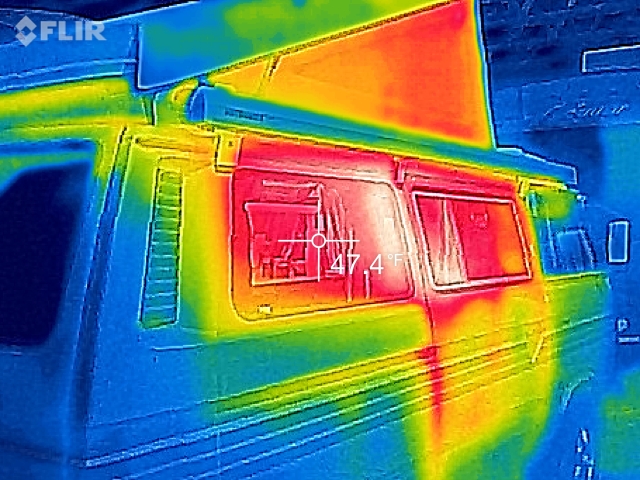
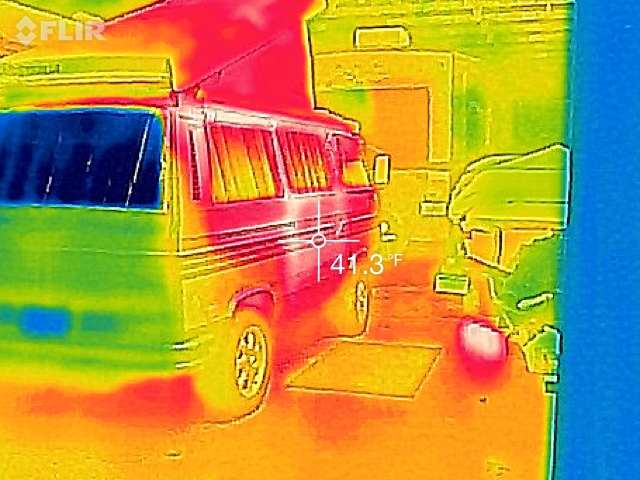
First, some thermal images with no rear hatch insulation:
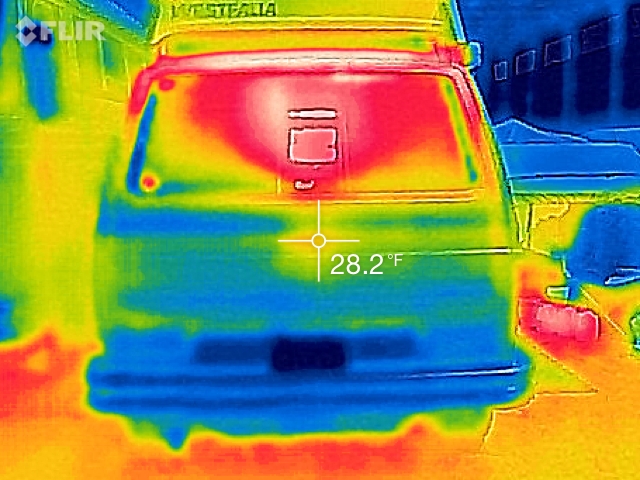
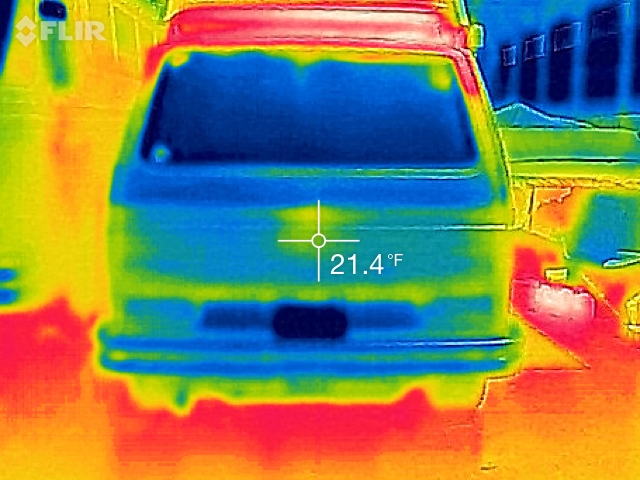
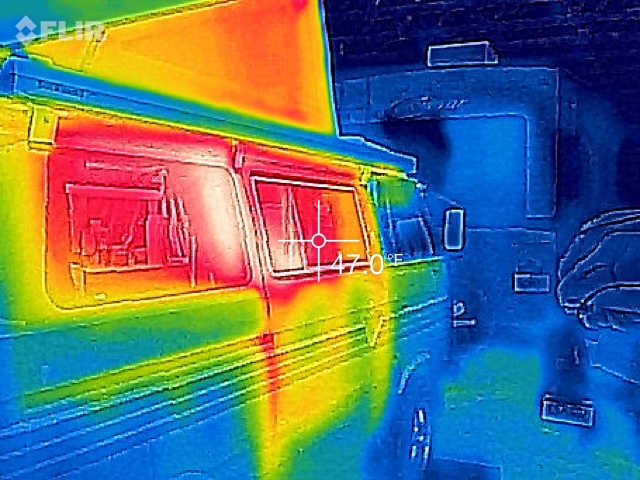
Next, the pictures with the Fancher’s rear hatch thermal installed (a definite improvement):
Conclusion
As you can see, the rear hatch thermal really improves the heat loss of the hear hatch. Most importantly, from a practical daily use perspective, it doesn’t feel drafty along the back hatch anymore. My van is feeling super cozy, and that makes me happy!
Stay tuned!
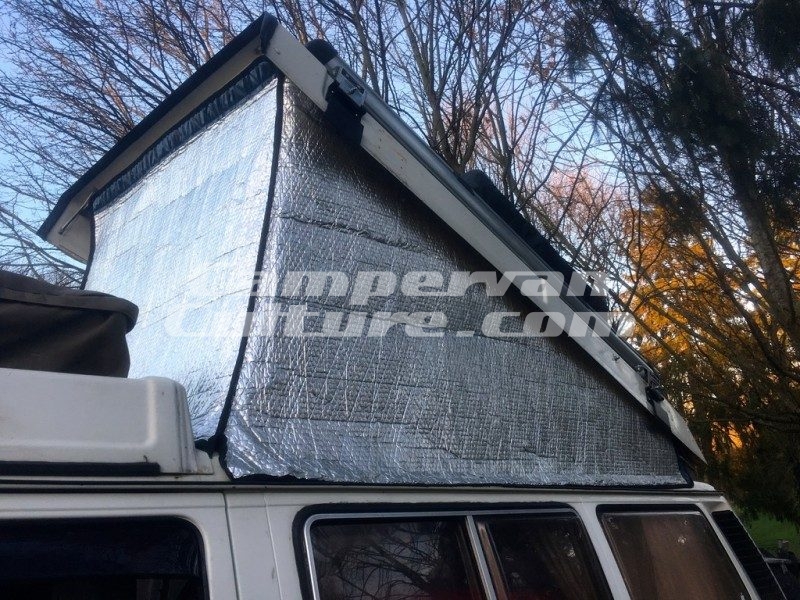
In part 5 of this series, I’ll be testing Campervanculture.com’s exterior reflectix tent thermal (Westfalia Roof Thermal Wrap). I think their product will kick ass too, just as much as these products from Fancher’s. Here’s a picture of the Campervanculture.com product:
This is part 3 in my series about reducing heat loss in my Vanagon Westfalia. In this installment, I show the affects of exterior insulation on the van windows. If you haven’t read PART 1 or PART 2 of this series then check them out here:
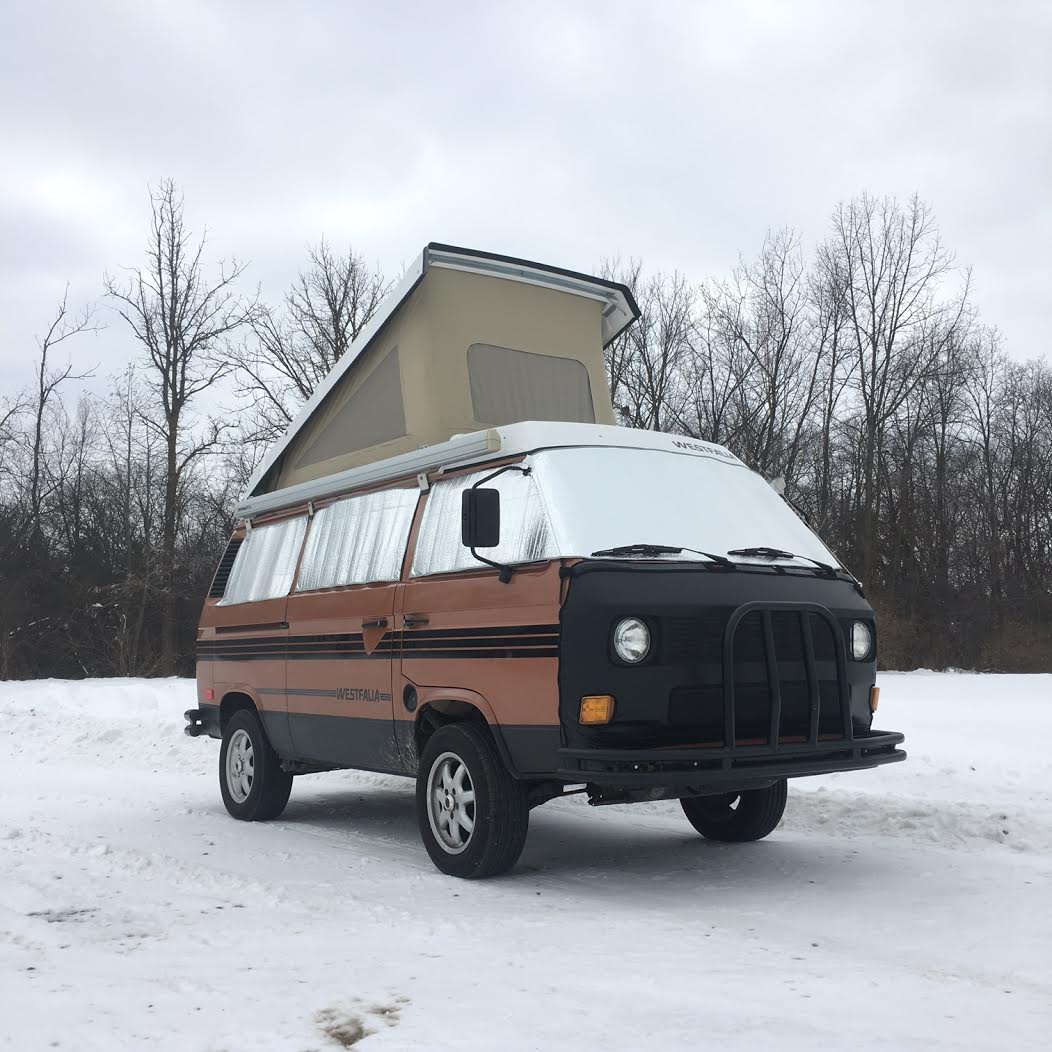
Here’s what the van looks like with the Reflectix style insulation mounted on the van:
The insulation is made by, yet again, Fanchers.com. Here is a direct link to the product on their website: Vanagon Outside Window Thermals R-4
This test was done on the evening of December 31st, 2016. The same evening I did the test for Part 2 of this series.
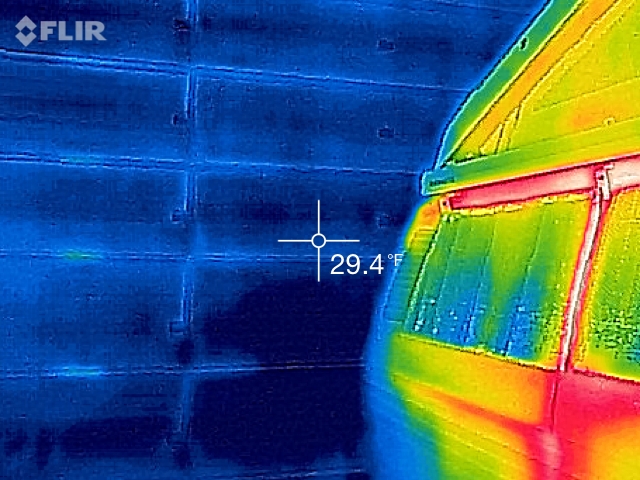
As a reminder, here are my baseline temperature readings for inside the barn and van. The temperature inside the unheated barn, as measured from the inside of the insulated barn door, was 29.4 degrees Fahrenheit:
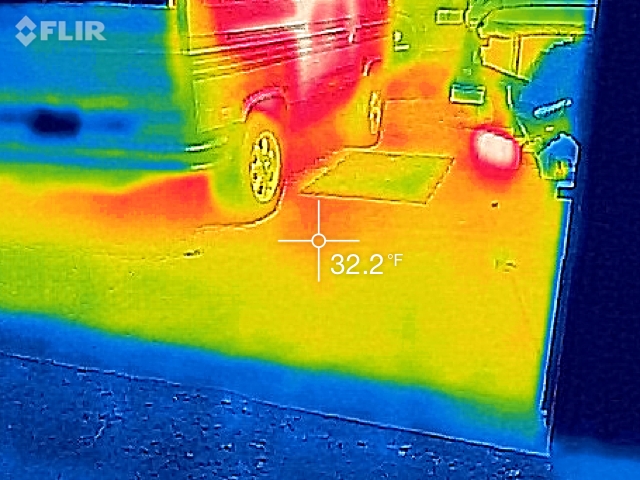
The temperature of the floor was 32.2 degrees Fahrenheit:
The temperature inside the van was 70 degrees Fahrenheit:
The following pictures show the windows with no insulation on the windows. The temperature of the windows is approximately 47 degrees Fahrenheit. Considering that the inside of the van is 70 degrees, the windows aren’t doing too bad of a job of insulating by themselves. I thought it would be worse.
These next pictures show the windows with the insulation in place. You’ll see that the temperature readings are right in line with the ambient temperature of the barn. That’s a 12-15 degree drop, which is great news!
Here’s one last picture showing the temperature of the sliding door below the window, where there is no insulation (that I know of).
Conclusion
In practice, I was really surprised by how well the exterior window thermals were working. Even before I took the thermal pictures, I could feel a difference when inside the van. The windows just felt much warmer and less drafty when the thermals were in place. These thermal images cement this feeling for me even more. Here are some pros/cons of using this style of insulation:
Pros
Works great!! Really helps keep the heat in for me.
Gets really dark inside the van, if you want to sleep during the day. Better than blackout curtains.
Easy to install. Held on by magnets. Way easier than the interior thermals that are held in by suction cups (I have a set of these too).
Cons
Really gets dark inside (I realize this was a pro too). It can be a little discombobulating when waking up in the morning. it seems like night time still, even if it’s bright outside.
If you want to peak outside through a window from inside the van, you can’t.
Potentially a problem when camping in high wind? I have not tested this.
This is part 2 in my series about reducing heat loss in my Vanagon Westfalia. In this installment, I show the affects of insulation along the sidewalls of our pop-top tents. If you haven’t read PART 1 of this series then check it out here: VW Vanagon Westfalia Pop-Top – Reducing Heat Loss – Part 1- Roof.
I did this test on the evening of December 31st, 2016. I started with all my tent insulation in place. With each successive test, I removed a layer of insulation. In addition, I waited about an hour after removing a layer of insulation before taking the next set of test pictures. i figured this would be enough time for the new configuration to stabilize and provide accurate temperature readings.
Like I mentioned in part 1, I have two layers of insulation along the pop-top tent walls. First, I have Fancher’s Pop-Top Thermals (R8) snapped into place. Next, I have that sandwiched between the tent wall and a layer of Reflectix you see in the picture below.
First, I took some baseline temperature readings. The temperature inside the unheated barn tonight, as measured from the inside of the insulated barn door, was 29.4 degrees Fahrenheit:
The temperature of the floor was 32.2 degrees Fahrenheit:
The temperature inside the van was about 70 degrees Fahrenheit:
Here is a series of images taken from the tent interior. As you’ll see, the temperature loss with each layer of insulation that is removed is pretty significant.
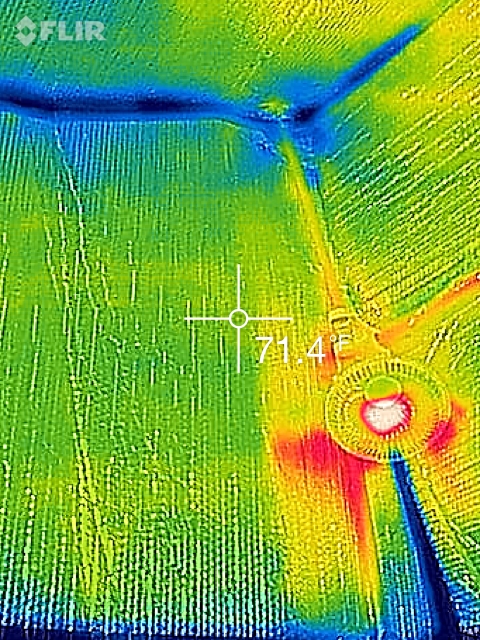
In the first image below, you can see that the INTERIOR tent wall (the Reflectix) is 71.4 degrees Fahrenheit. My temp reading at counter height was 70 degrees (see above), so the current insulation configuration is doing a really good job of keeping the heat in. It’s warmer up higher in the cabin, as one would expect if you’re insulated properly. Warm air rises! I have a couple of fans in the cabin, which circulates the air, and helps with keeping a consistent temp from top to bottom. If I didn’t have the fans, i think my reading would have been higher for this image.
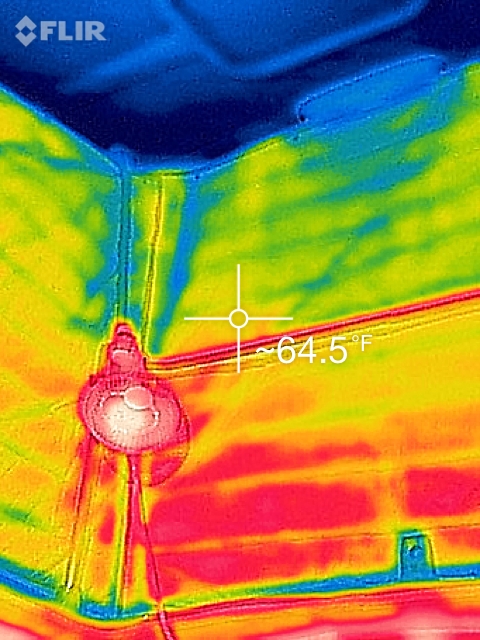
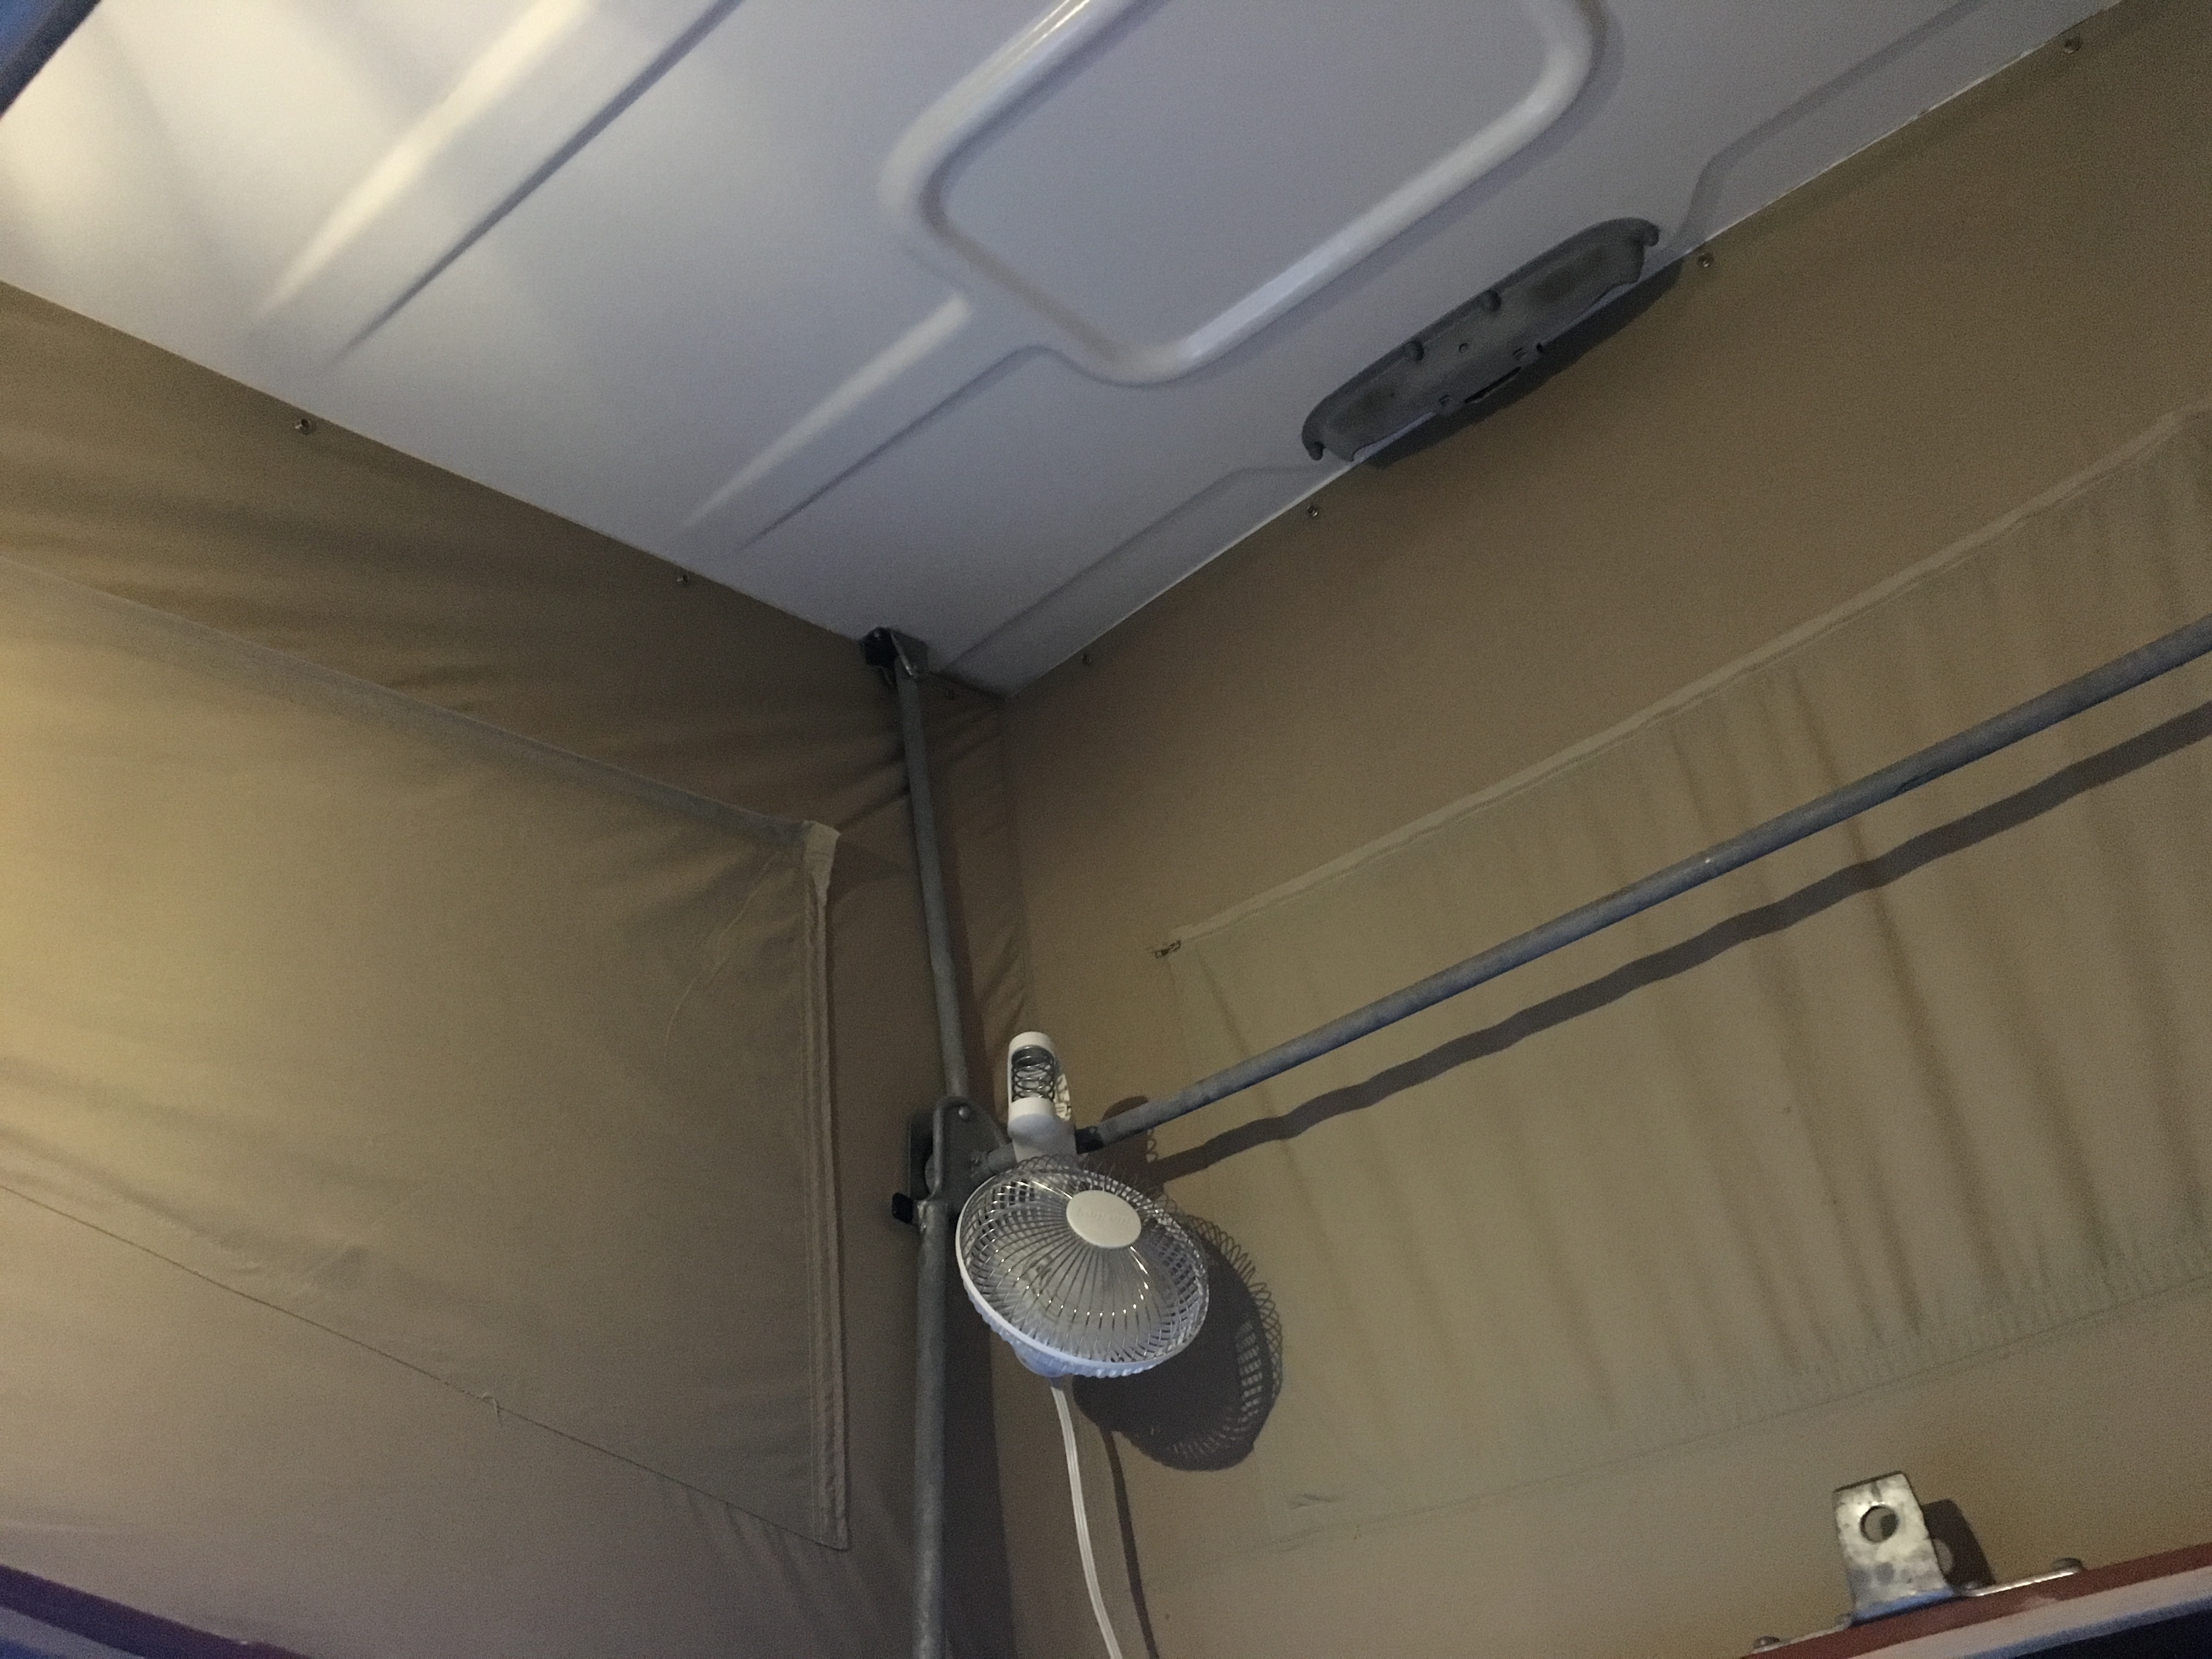
Next, I removed the Reflectix and left the Fancher’s product in place. Here’s what it looks like installed (Looks so nice! Quilted! So cozy!):
Here’s a thermal imaging picture showing a temperature of 64.5 degrees Fahrenheit with just the Fancher’s product in place. As you can see, the temperature has dropped about 7 degrees without the Relectix in place, despite the baseline cabin temperature still being 70 degrees. This is still really good, considering it was about 30 degrees Fahrenheit in the barn.
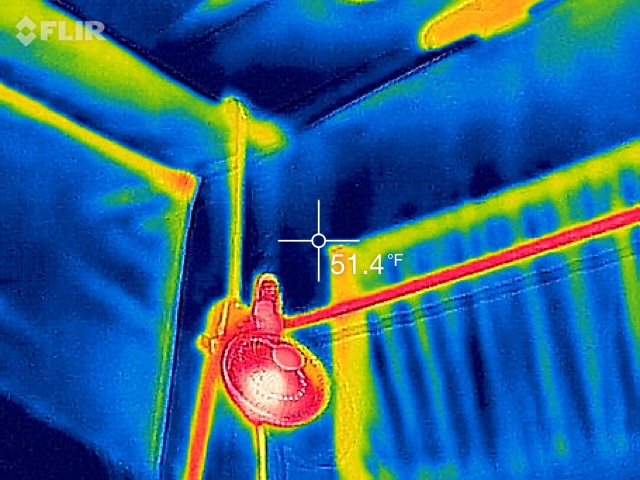
Next, I removed all the insulation from the tent. Here’s a picture (brrr!):
With no tent insulation, and my baseline temperature at counter height still at 70 degrees, the temperature reading of the tent wall ranged from 51 to 52 degrees Fahrenheit. That’s a 12-13 degree drop from the last temperature reading, and about a 20 degree drop from the first reading. Wow! I guess it shouldn’t be surprising, but wow! Here are a couple of pictures:
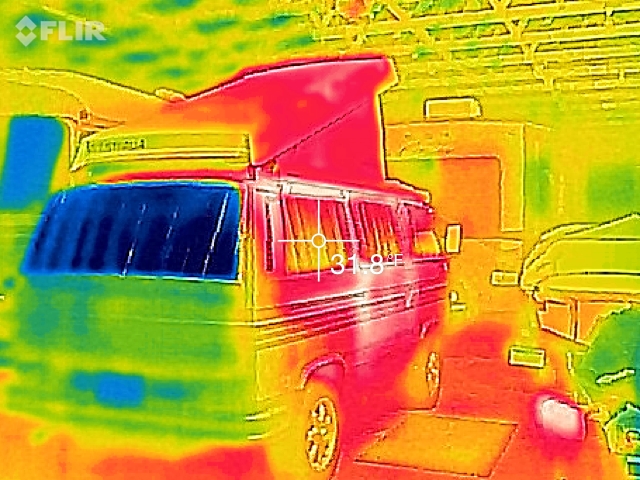
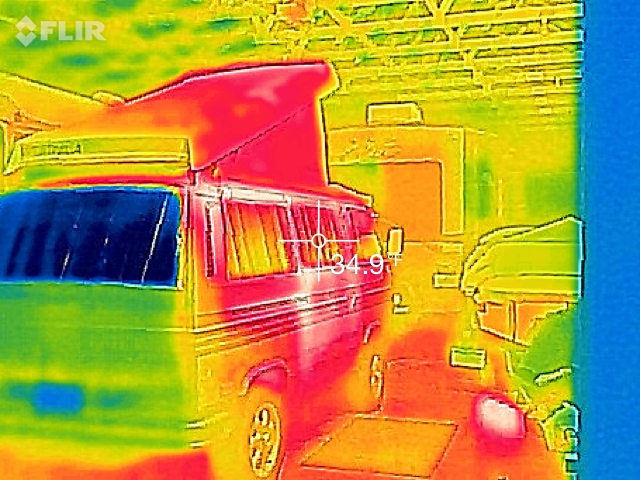
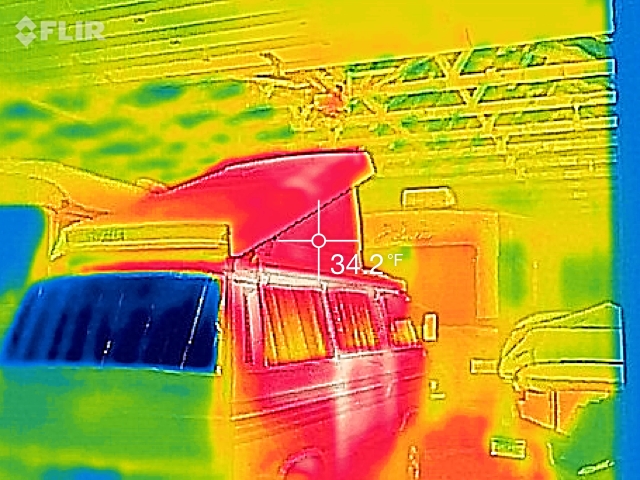
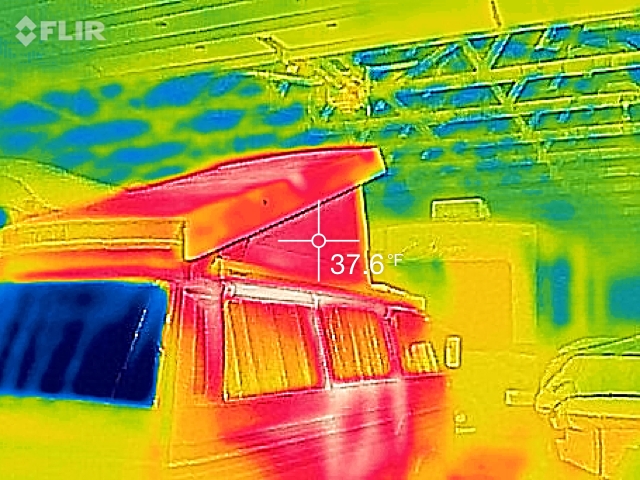
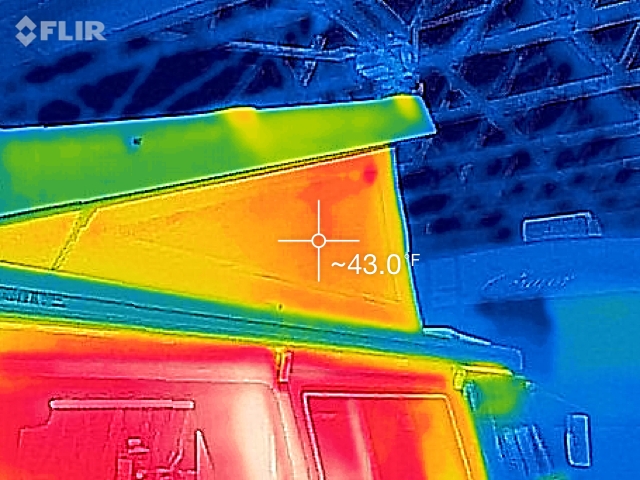
Here are some additional pictures showing the EXTERIOR temperatures of the tent walls. Remember, it’s about 30 degrees Fahrenheit in the barn. I’m not quite sure why the temperature change from each image to the next isn’t as dramatic as the interior temperature readings, but there is definitely a difference.
First, with all insulation layers in place, my temperature reading was 34.2 degrees Fahrenheit:
Next, with the Reflectix removed, the temperature is 37.6 degrees Fahrenheit (a 3.4 degree difference):
Finally, with no insulation. The temperature reading is 43 degrees Fahrenheit:
Conclusion
Like in part 1 of this series, I learned a lot from this test. The insulation dramatically helps with keeping the heat in. That 2nd layer of Reflectix helps a lot too! I think in the end, if I’ll be camping for a couple days at a time in the winter, then the Fancher’s R8 thermals are more than enough. I guess that decision would depend on the outside temperature too. If it’s in the single digit temperatures, as it often is in Michigan, then I’d probably opt for both layers. The Fancher’s thermals are not cheap, but they’re extremely well made, look fantastic, are easy to snap into place, and fold up nicely into their own storage bag. The Reflectix works well too, but just isn’t aesthetically pleasing for the inside of the camper, and doesn’t fold up quite as nice. For some, that may not matter and it’s certainly a much less expensive alternative if all one cares about is keeping warm. If you’re living in your van, or camping for longer periods of time, I’d highly recommend the extra layer of insulation (Reflectix in my case) as it really does help things out. I know one thing… With each layer of insulation, my heater ran much less and didn’t have to work nearly as hard. With no insulation, the heater NEVER shut off and worked hard to keep up with the heat loss.
NOTE: As I was writing the conclusion, I thought of one more test that I should have done. I should have tested with just the layer of Reflectix installed. This isn’t all that important to me, as I love my thermals from Fanchers, but it may be helpful to someone else. Stay tuned for that in another blog post! Thanks for reading!


