
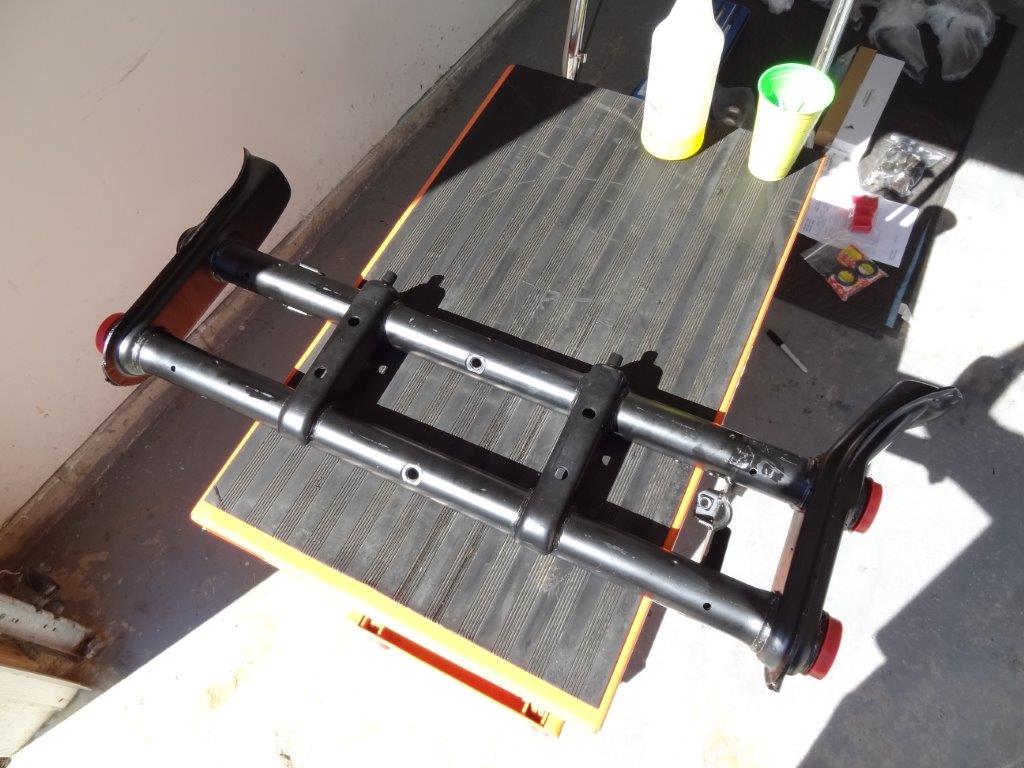
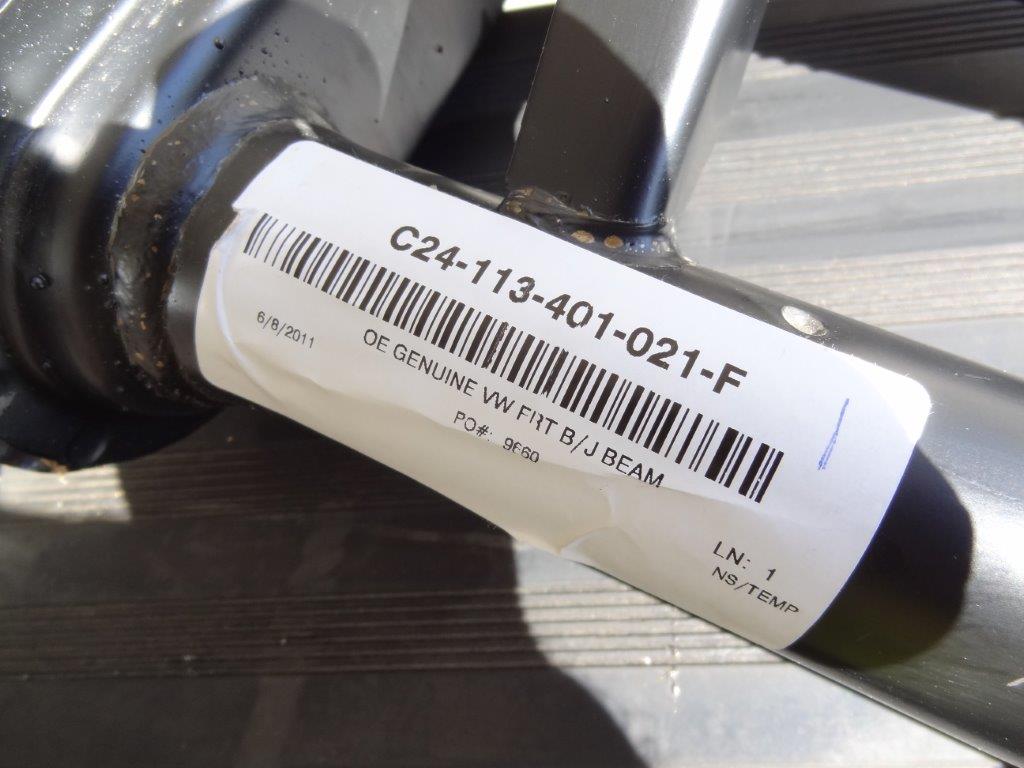
Today I’m going to build my new stock front beam. This is a brand new stock beam, which I believe VW will be stopping production on in 2013. If you’re thinking of getting a new OEM stock ball-joint beam, then now may be the time to do it.
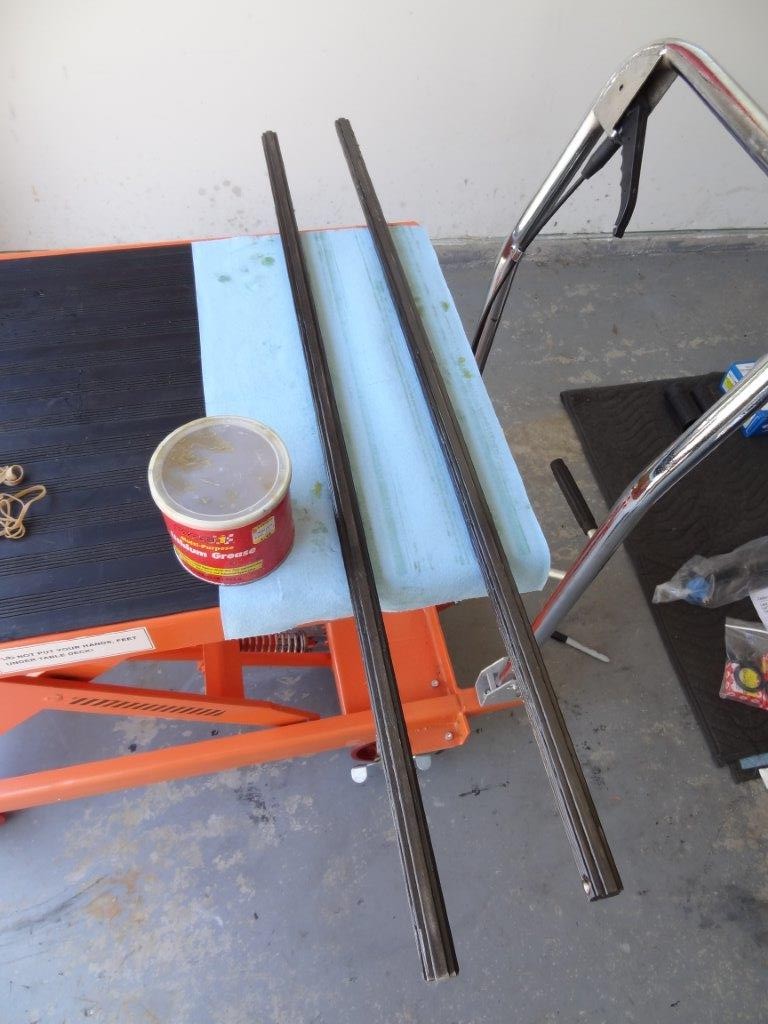
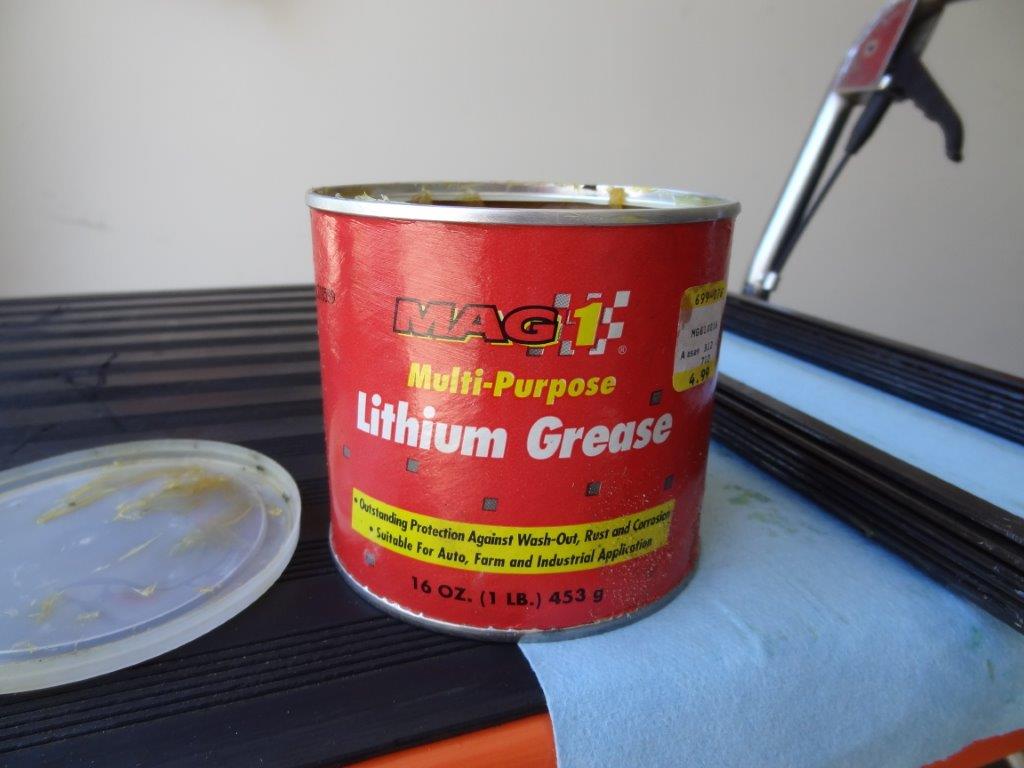
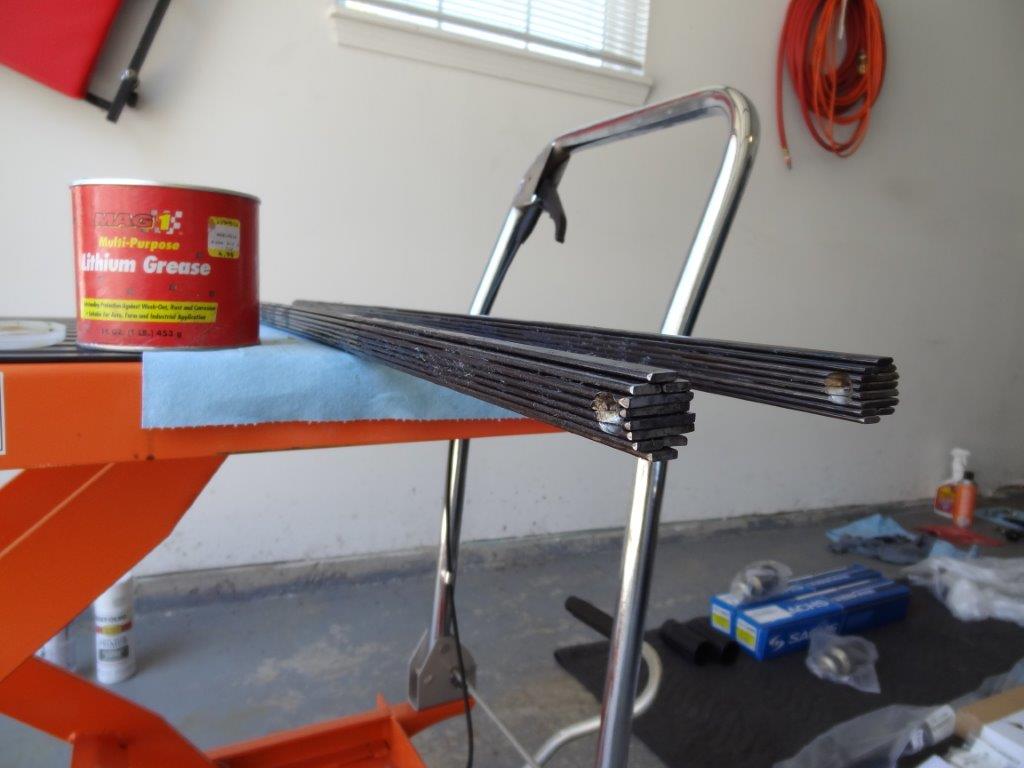
First up, I need to install the torsion leaf spring bundles into the beam. These get inserted into the beam torsion tubes to provide the “spring” in the suspension. I put a thin layer of lithium grease on them when I pulled them out of an older beam I had saved for parts. This helps to prevent rusting. These are the only used parts I used while building this beam since they were still perfectly good springs.
As you can see, there is certain pattern that these torsion springs must be stacked. These match up with the center notches inside the beam torsion tubes, which I show you in a picture below.
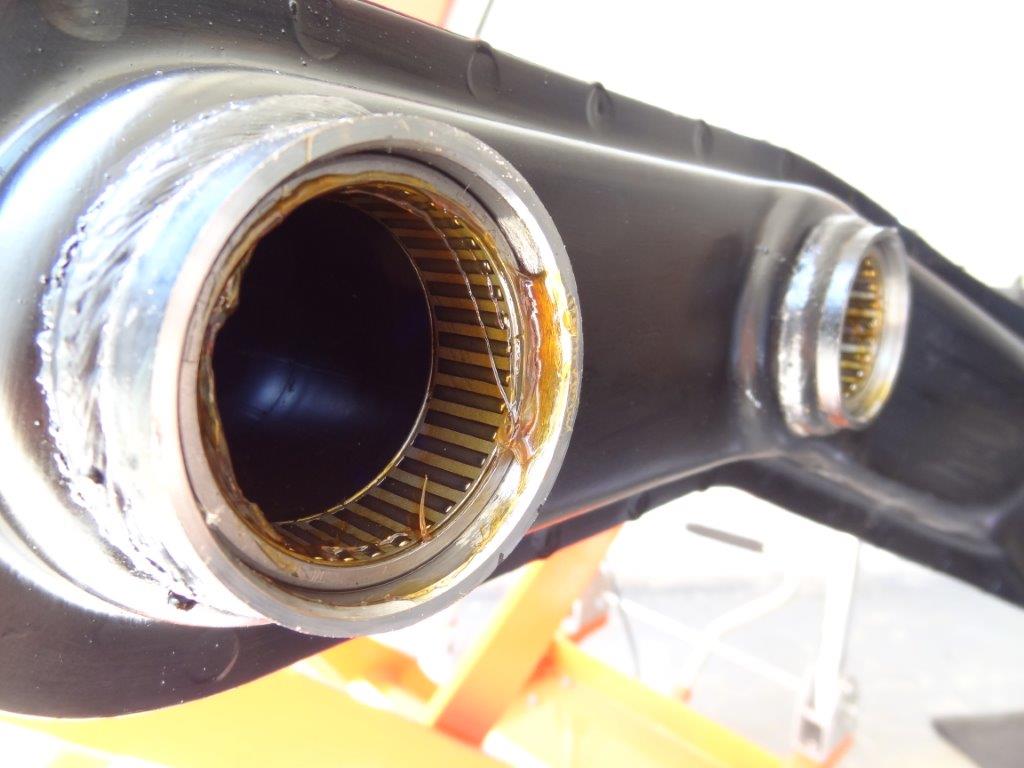
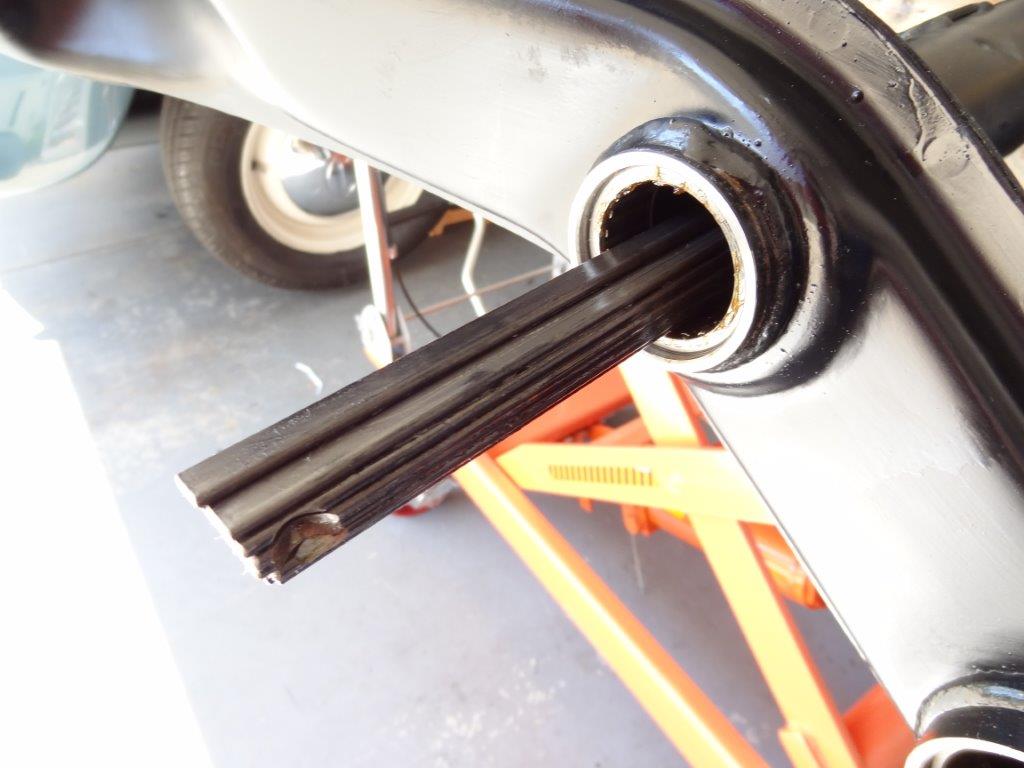
Here are the openings to the torsion tubes. There are openings on both sides of the beam. This is where we’ll insert the torsion springs.
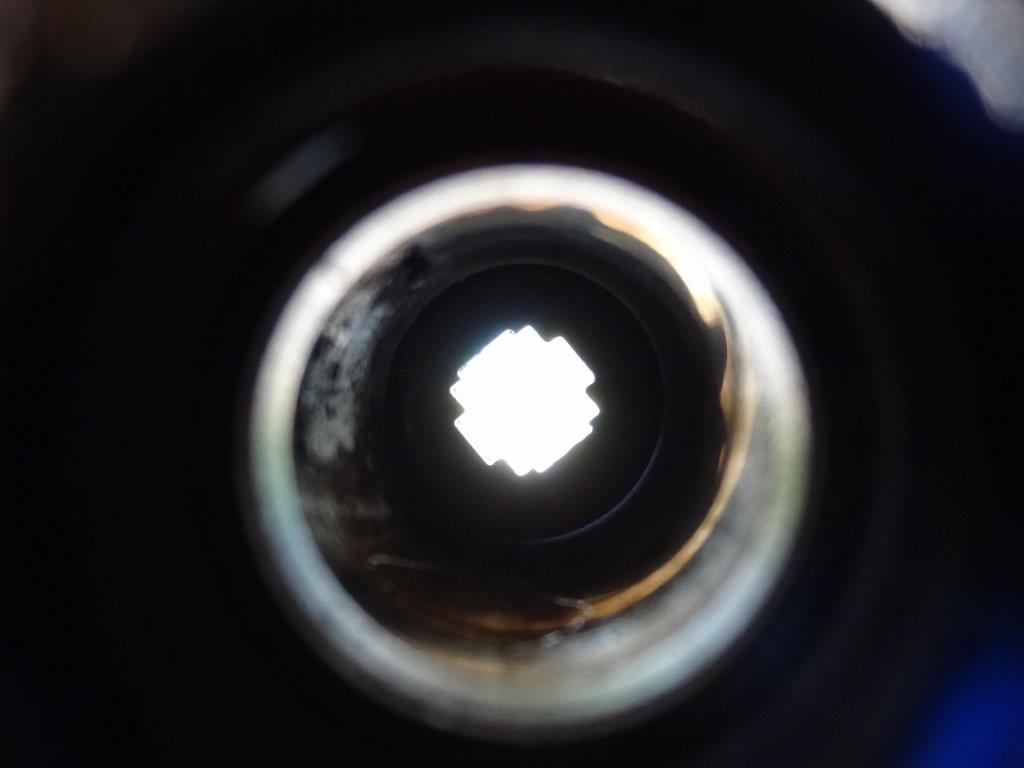
Here are the alignment notches in the center of the torsion tube (mentioned above). You need to get the leaf springs inserted through that notch. It sounds easy, but it’s a little tricky and takes some finesse. I have a little trick using electrical tape that I’ll try to explain below.
Before we install the leaf spring bundles, let’s install the torsion arm seals.
Before (the torsion arm bearings come from the factory with some grease in them):
After (the seals press right in):

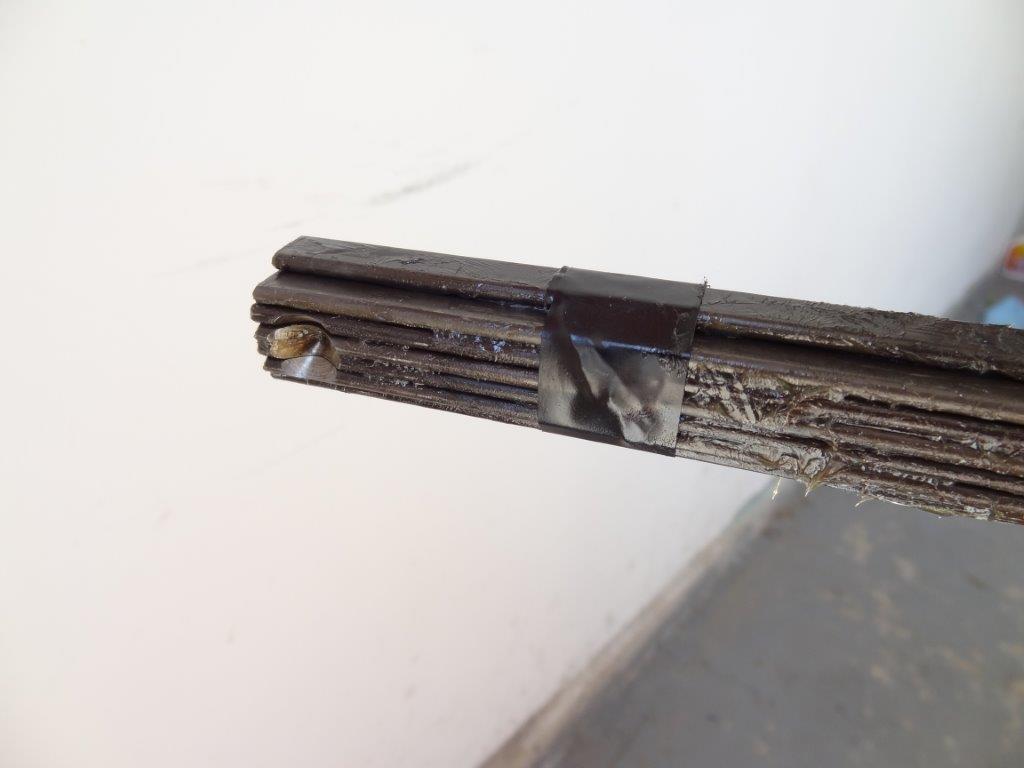
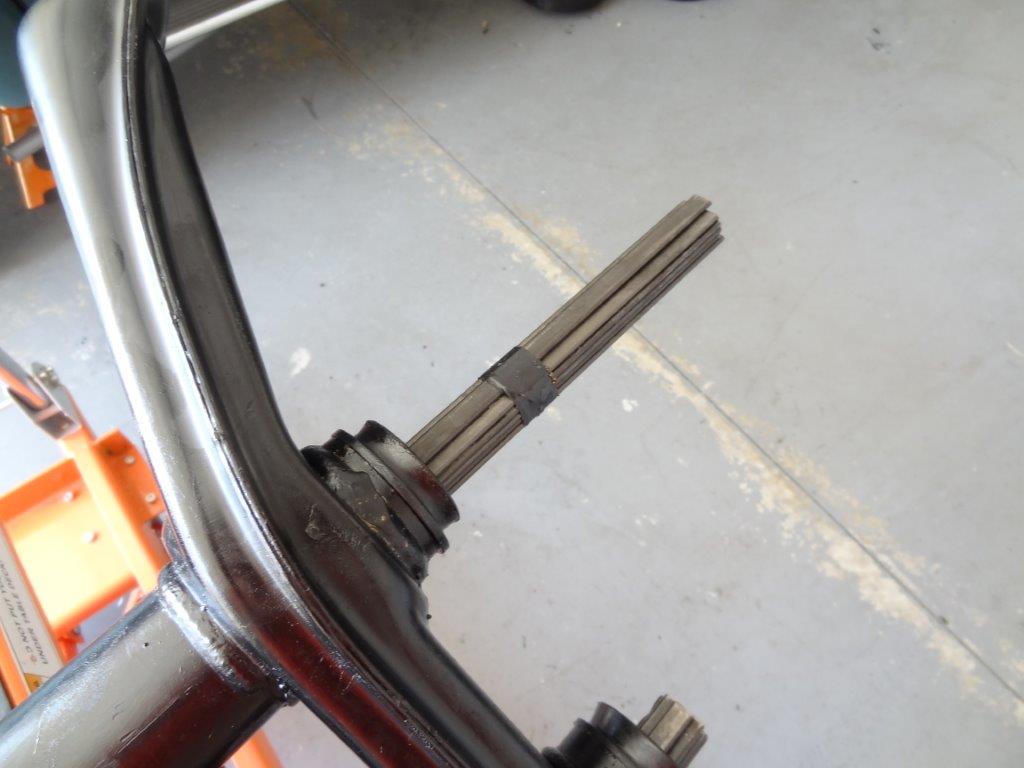
The trick to installing the spring bundles is to tape the side of the leaf bundle that you’ll be inserting to the beam first, as shown below. This helps keep all the leafs in place while you’re finessing them through the beam center notches. See taped end below:
Below is the end I taped, AFTER I pushed it through from the other side. As you can see, the tape is no longer where I placed it. Where is it? It’s hung up on the notches inside the middle of the tube. We can’t leave it in the center of the tube though. The trick is to keep pulling the leaf bundle through so that the tape gets pushed to the other end of the spring bundle (since the notches won’t let it pass through). The leaf bundle has the lithium grease on it, so the tape slides pretty easily as you pull.
Here is the spring bundle pulled all the way through from the other side. Remember, this spring bundle was pushed through from the right (driver side). That tape is now on the other end of the spring bundle which is in the center of the tube at the moment. Make sure you don’t pull too far, otherwise you’ll end up pulling the spring bundle out of the center notch and you’ll have to start all over again. Also, the tape would end up coming off and be stuck in the center of the tube. Now, push the spring bundle back through the tube so the driver side end of the leaf bundle is out of the tube.
You’ll end up with this. Now just remove the tape! The spring bundle is installed for one of the tubes. Now you just have to repeat these steps for the 2nd spring bundle (You can see I already have my other leaf spring bundle installed. It was easier to do that one without taking pictures, and save the picture taking for the 2nd spring bundle 🙂 ).
Now it’s time to secure these leaf bundles to the beam. In the center of the leaf bundle you’ll see a dimple that looks like this.
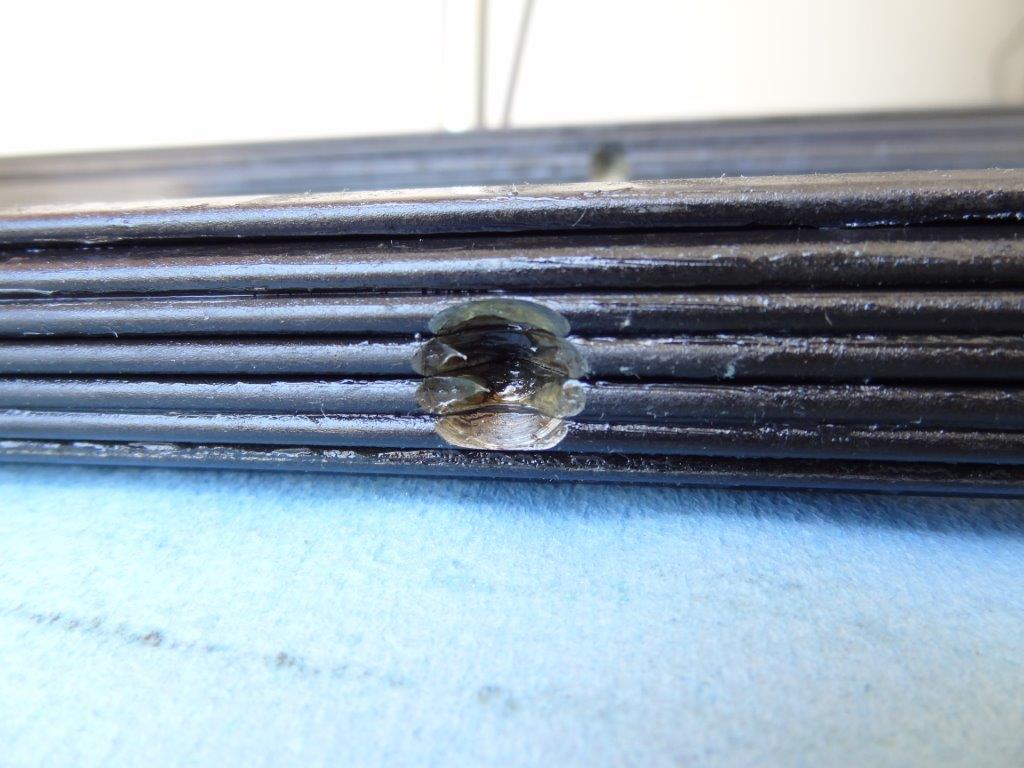
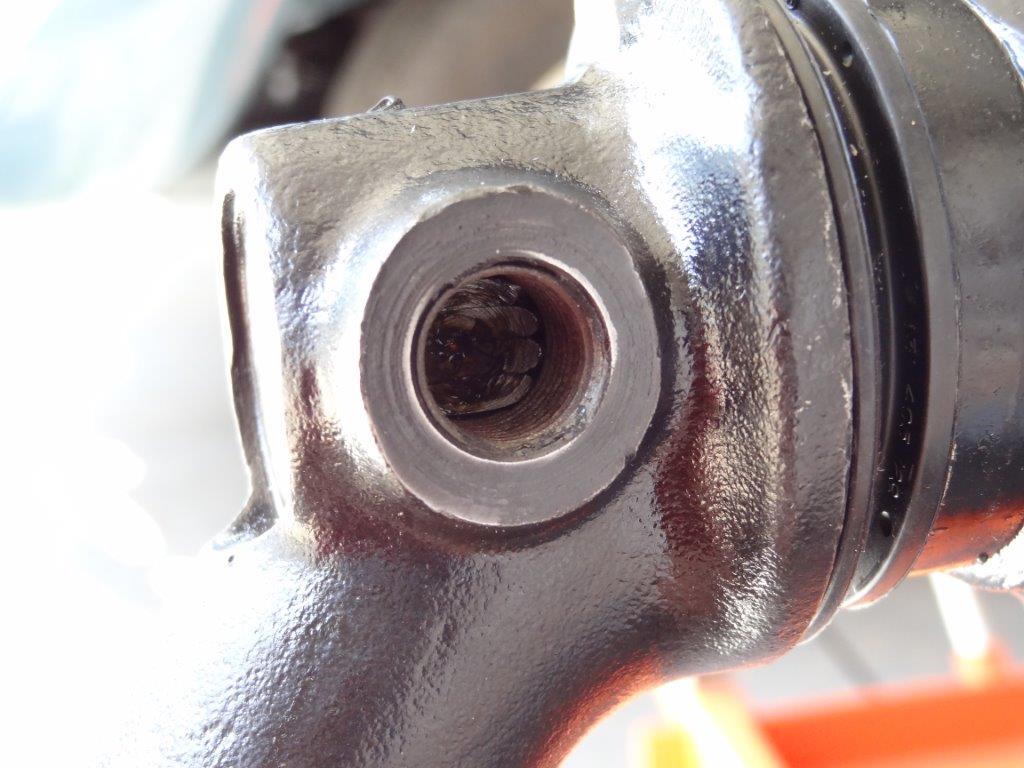
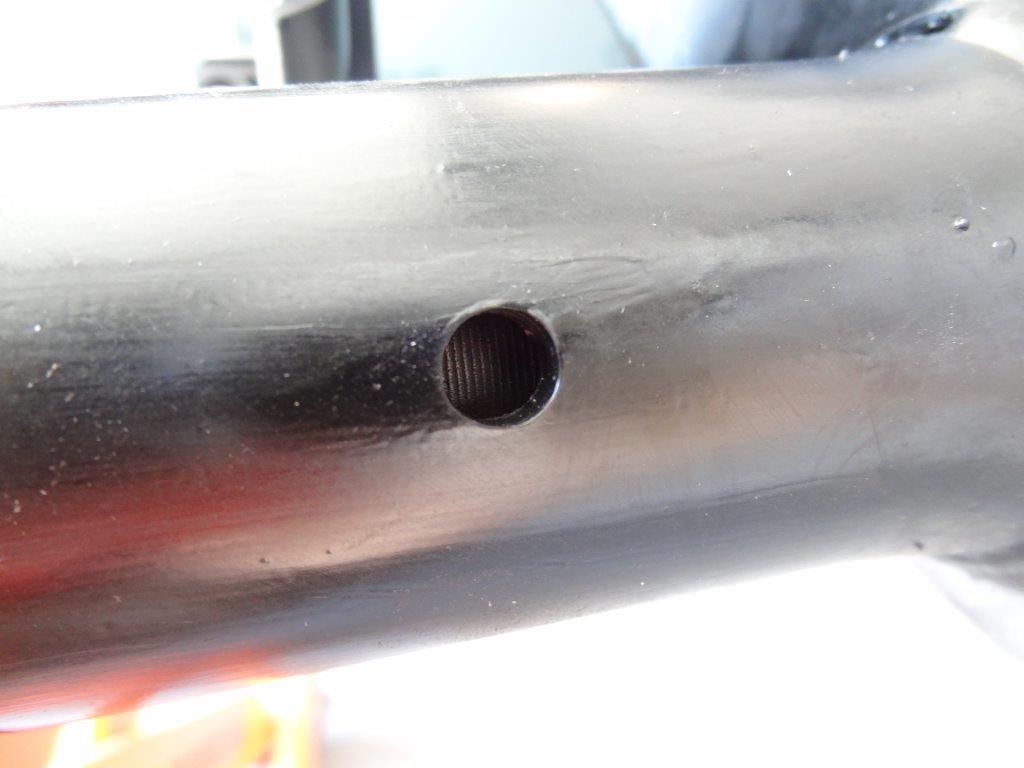
That dimple needs to line up with the hole in the center of the torsion tube, like this:

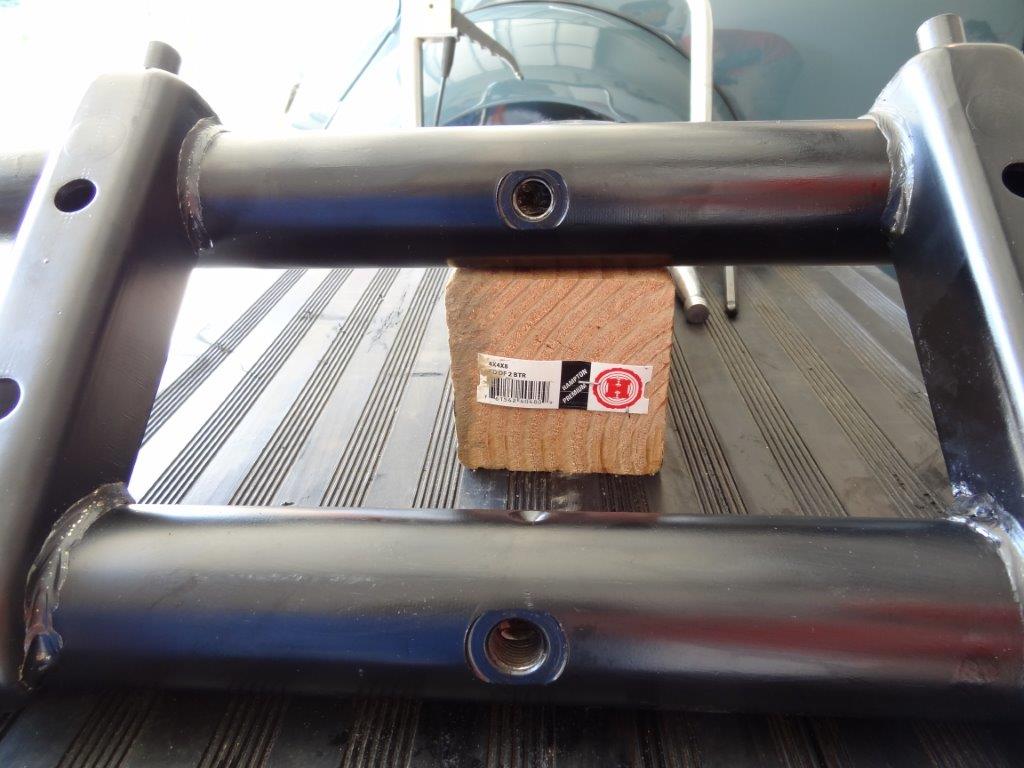
Here are the holes in the center:
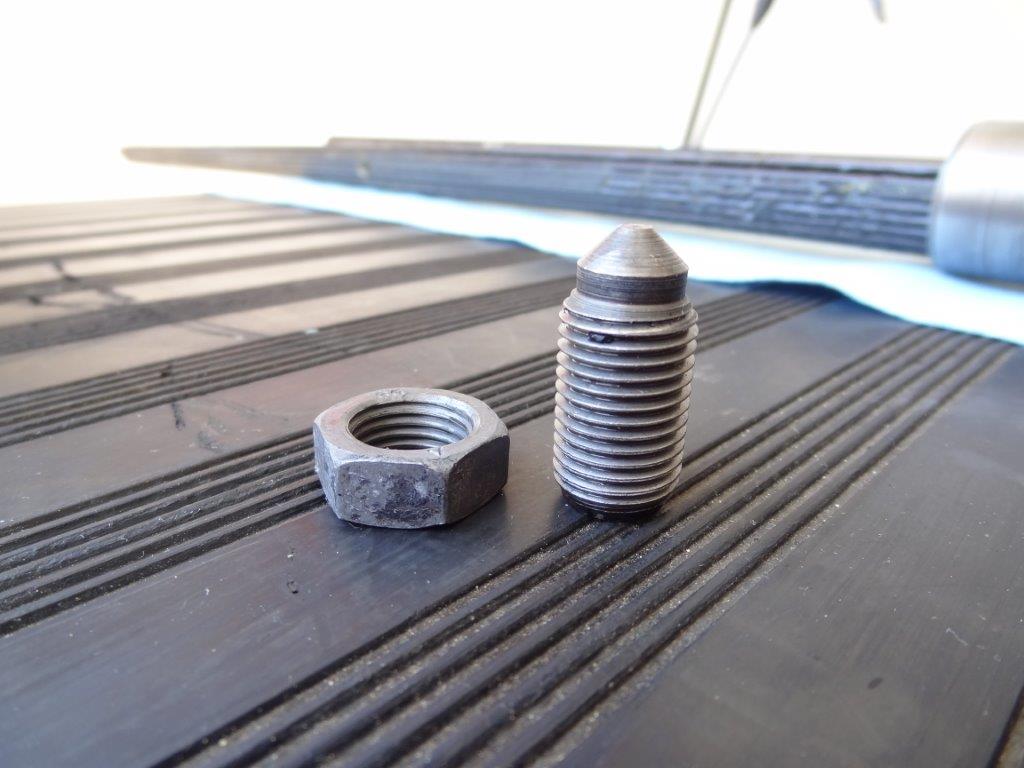
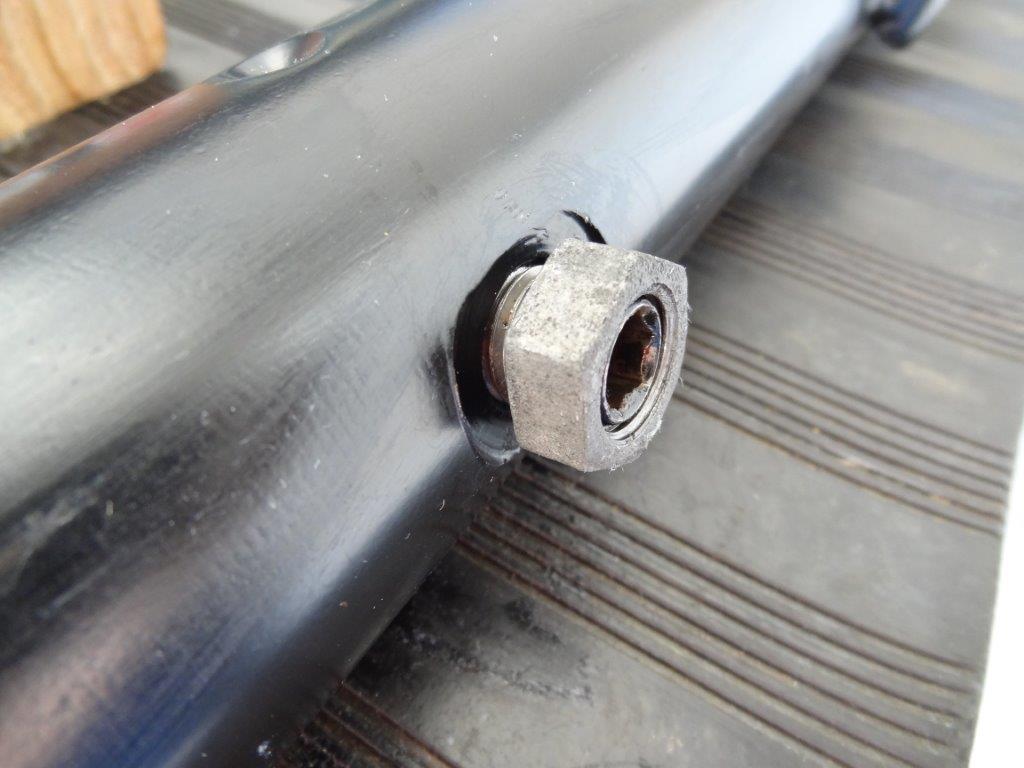
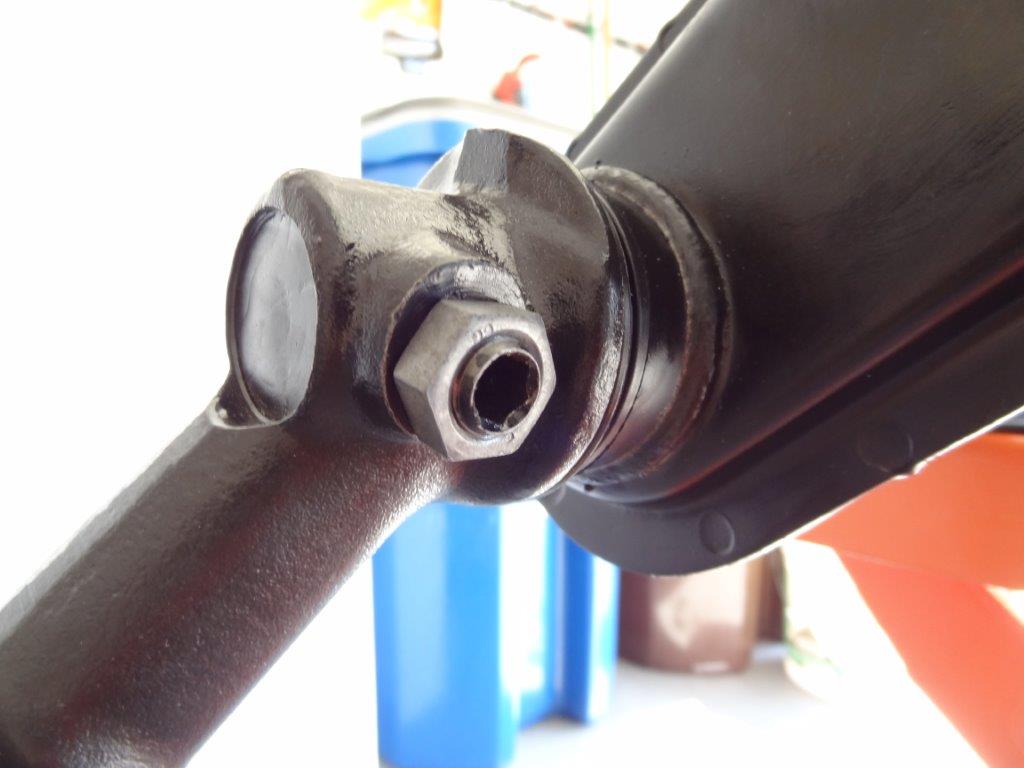
The leafs are secured to the beam using a grub screw and nut, which looks like this:
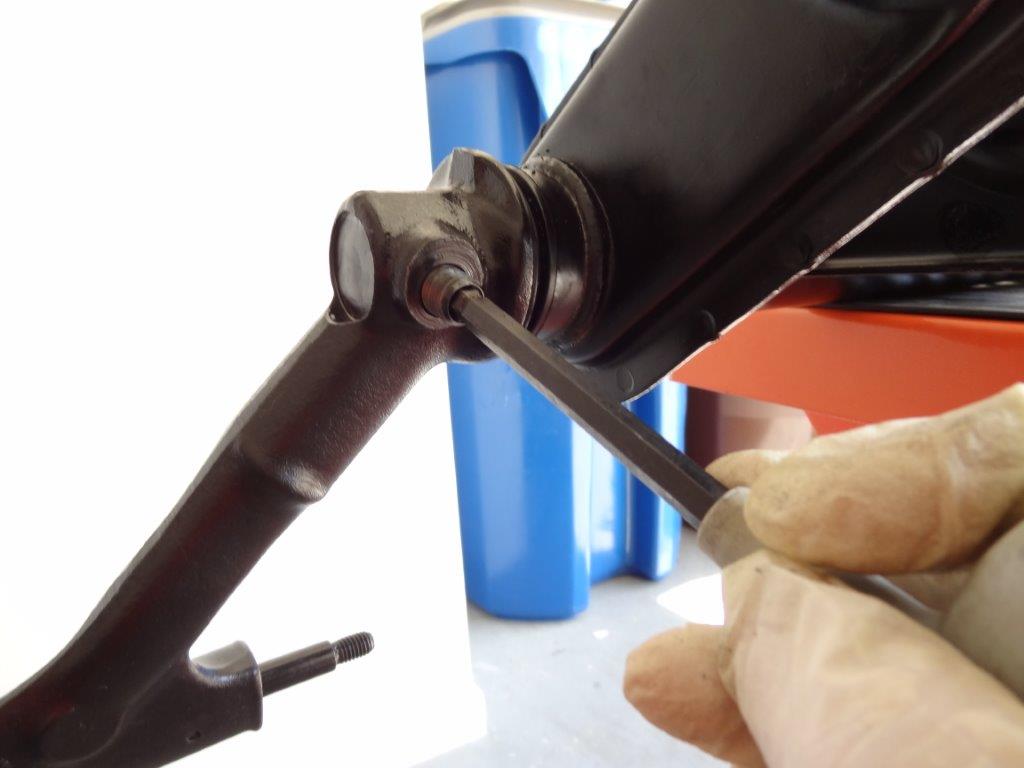
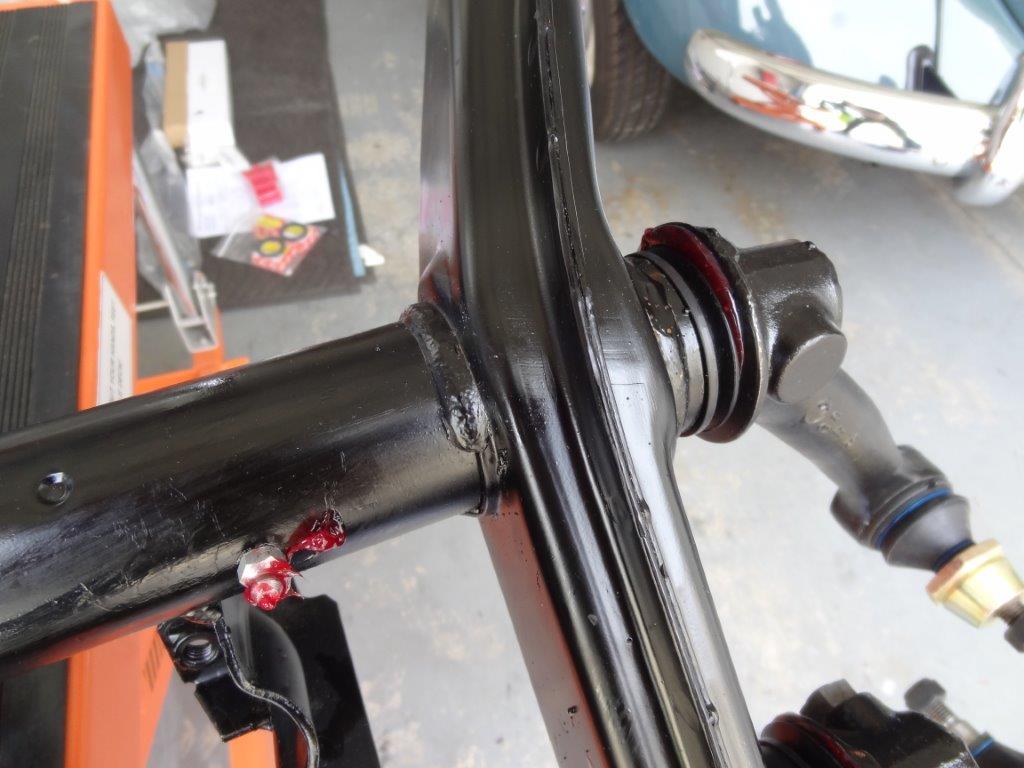
Here I am threading the grub screw into the beam using an 8mm allen wrench. Tighten it down good and tight.
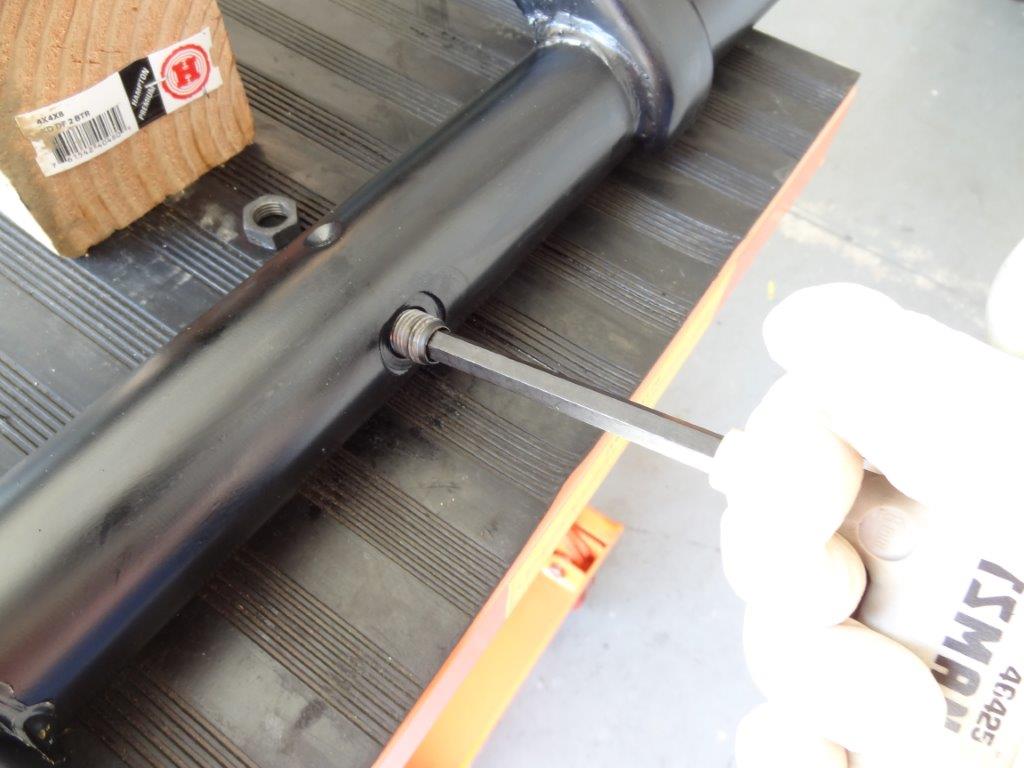
Now, thread on the grub screw nut and tighten it down with a 19mm socket wrench. The grub screw prevents the spring bundle from coming out of the beam, and needs to be done on each tube.
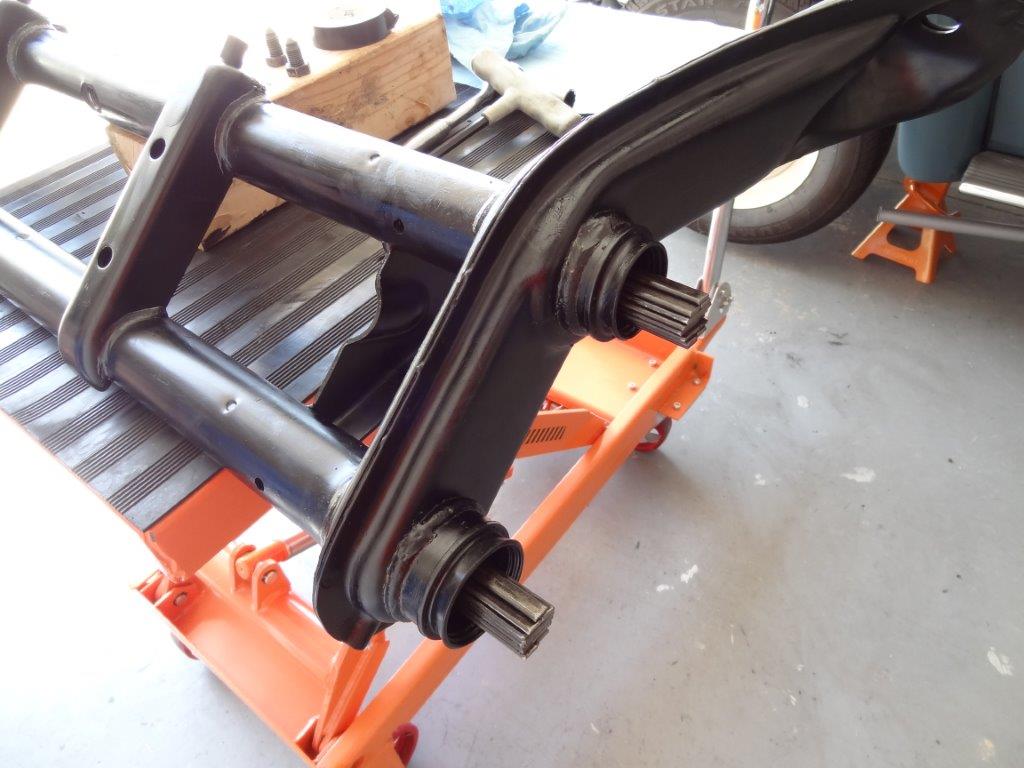
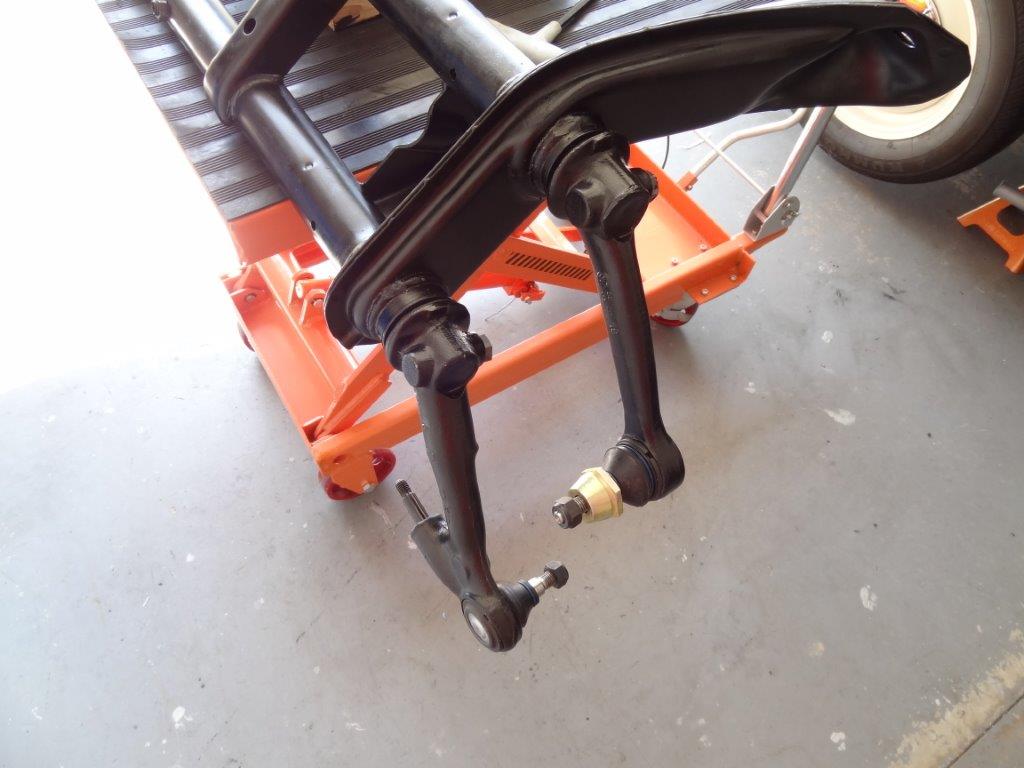
Now it’s time to install the trailing arms. Slide the trailing arms on to the ends of the leaf bundles. Like this:

The hole in the trailing arm needs to line up with the dimple in the end of the leaf bundle. Like this:
Thread in the grub screw and tighten it down with the 8mm allen wrench.
Thread on the grub screw nut and tighten it down with the 19mm socket. Repeat for each trailing arm.
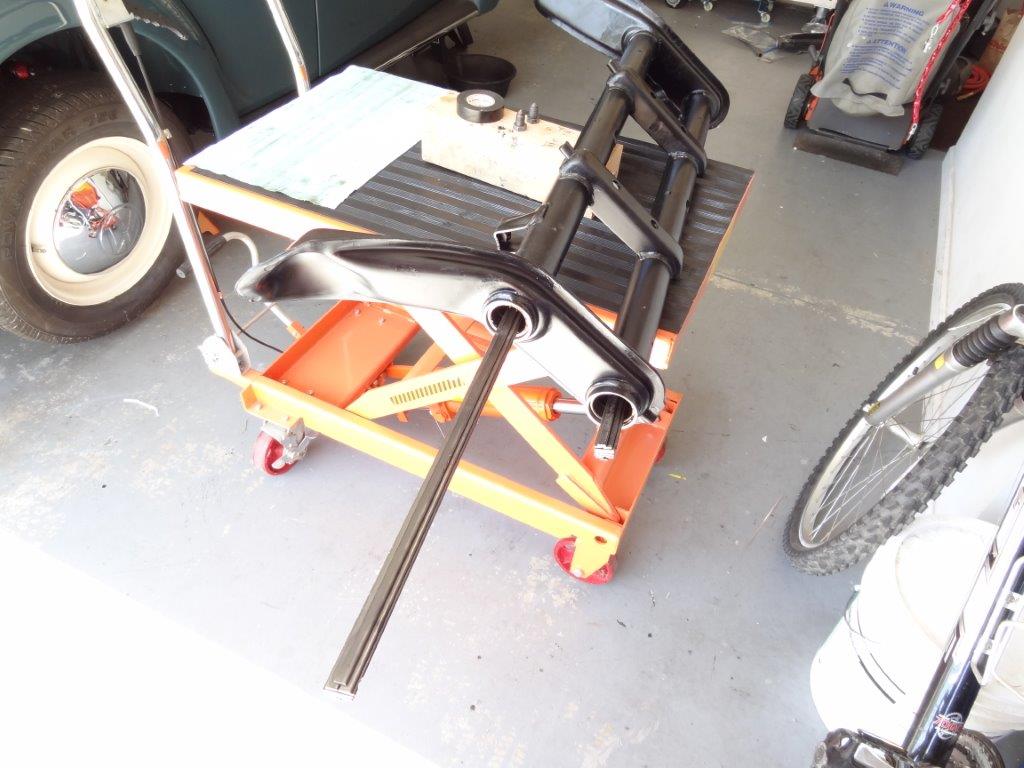
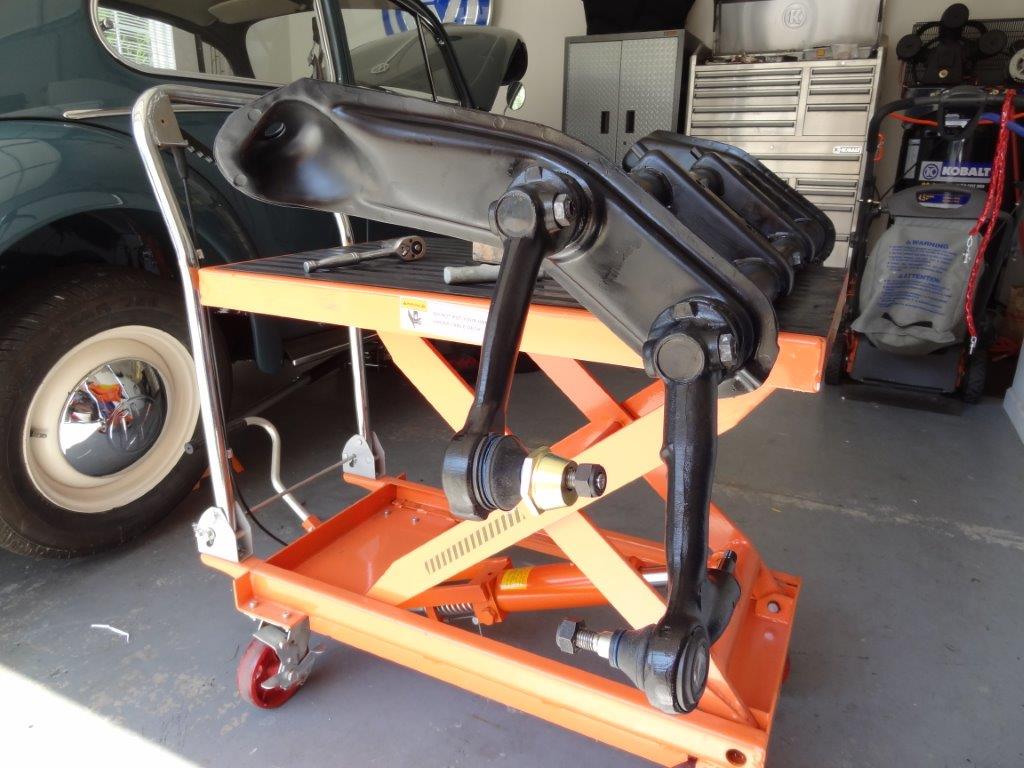
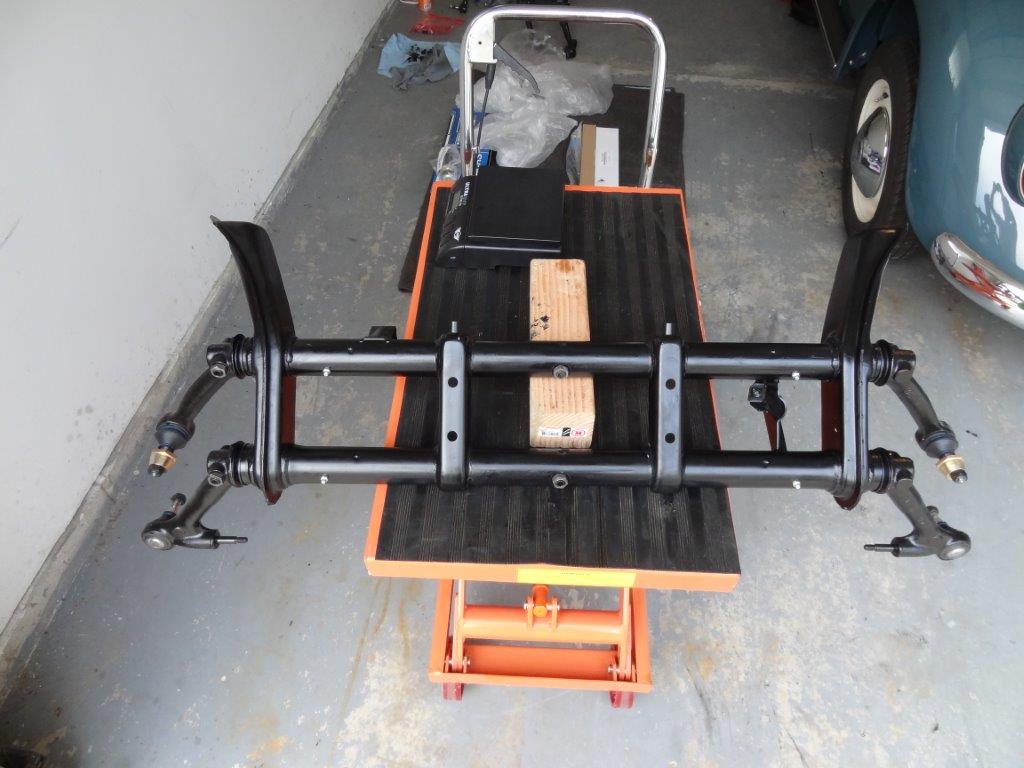
When all 4 are installed, it will look like this.
Now it’s time to install the zirk fittings and then pump in some wheel bearing grease. There are a total of 4 zirk fitting holes. 2 per tube and 1 per side. Here’s one of them without a zirk fitting threaded in…
Wrenching in a zirk fitting…
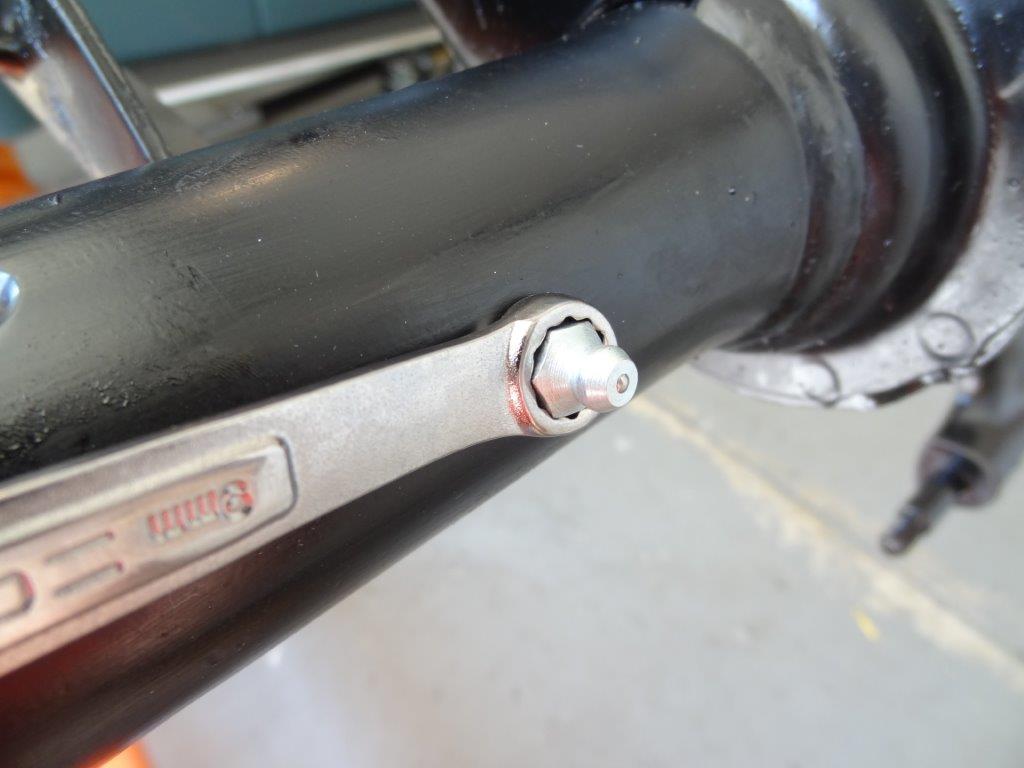
Installed…
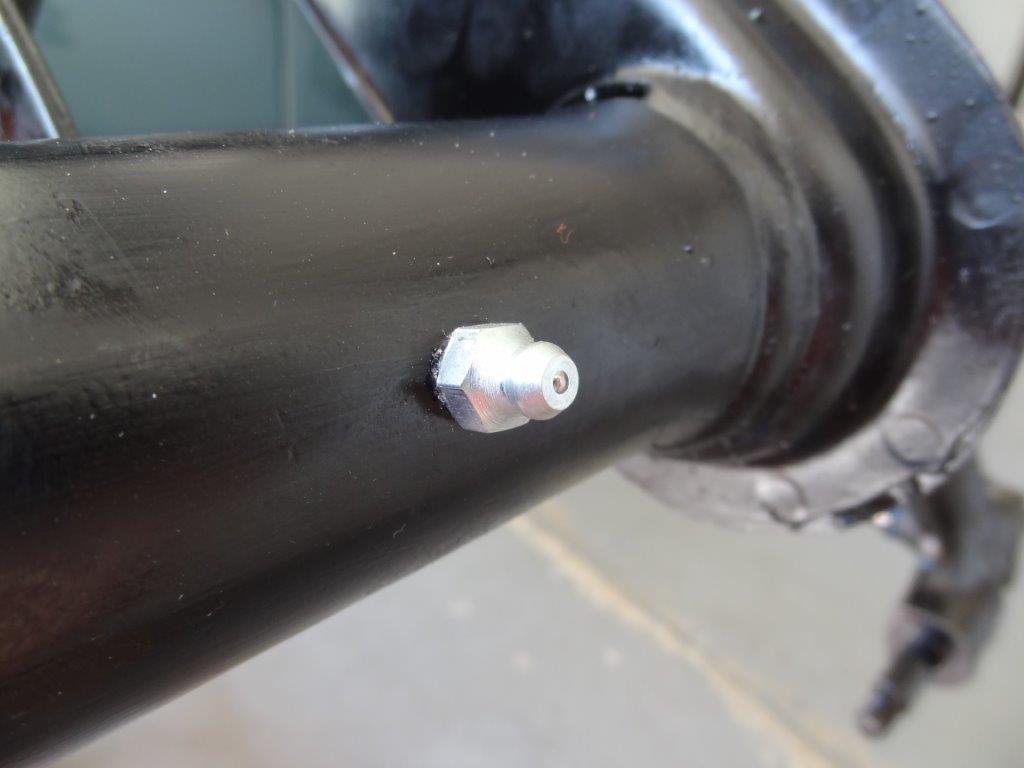
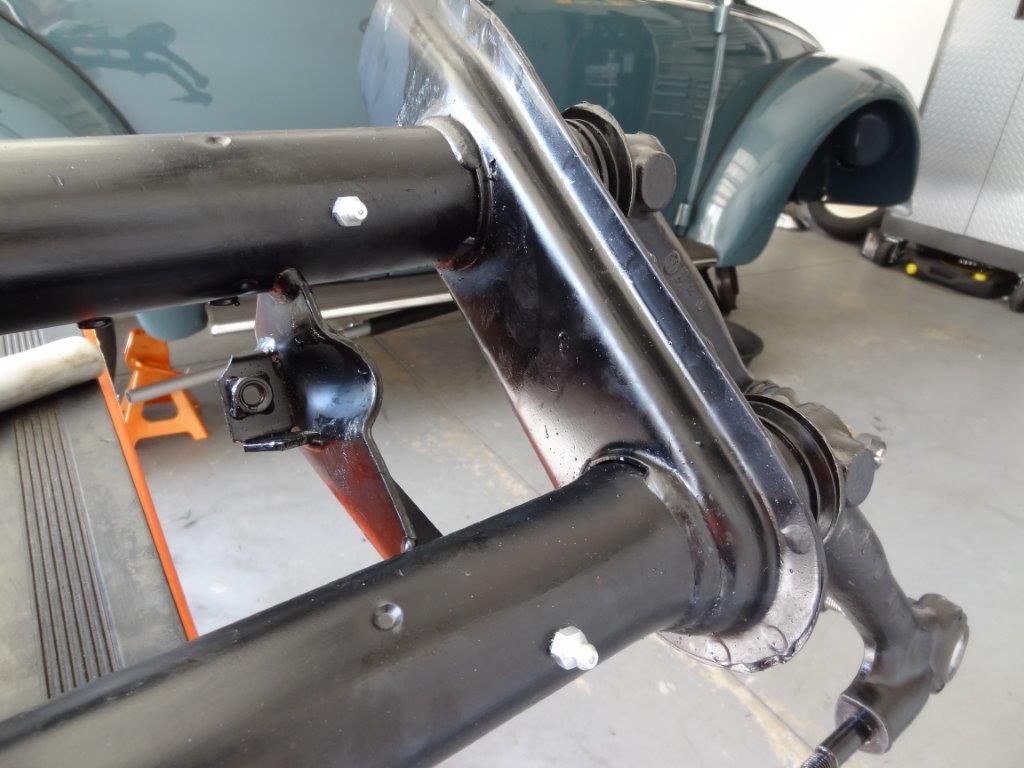
Here’s a picture showing 2 of the 4 zirk fittings. There are two more just like it on the other side (passenger side) of the beam…
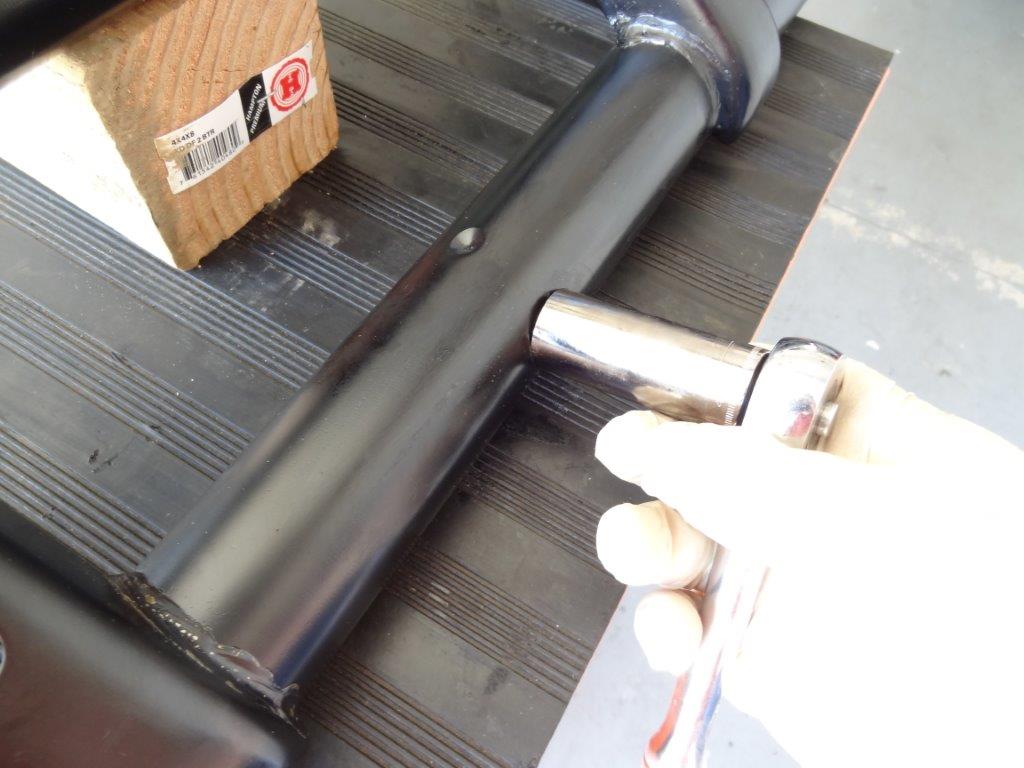
Let’s pump in some grease…
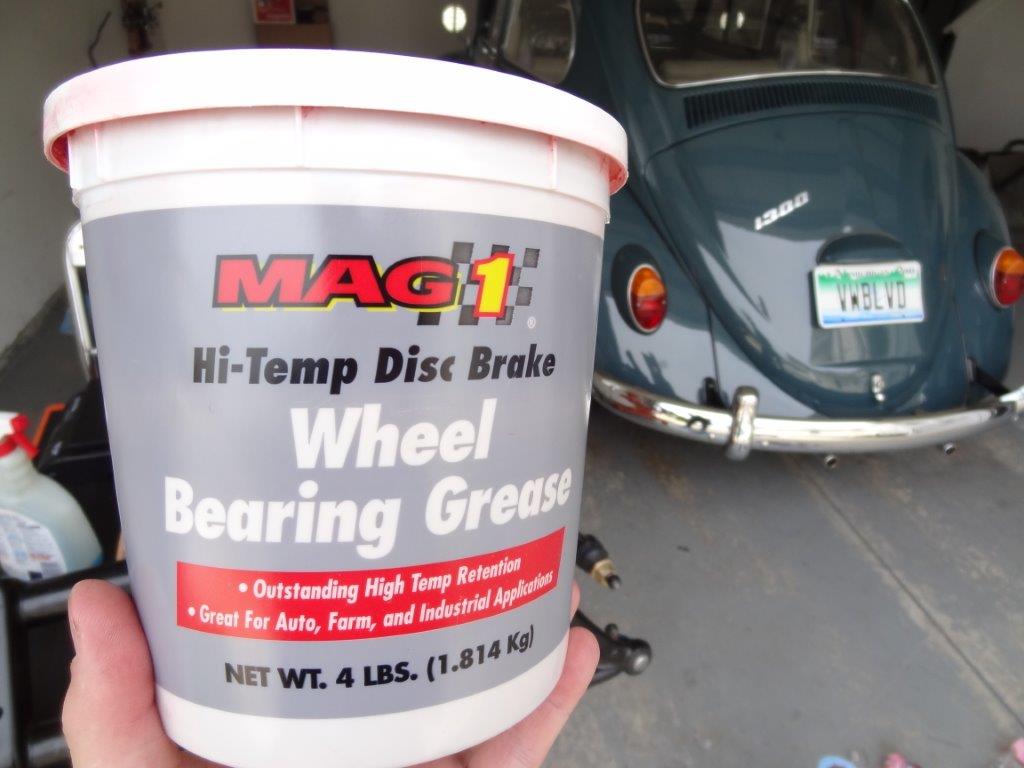
Hook up the grease gun to a zirk fitting and slowly pump in some grease.

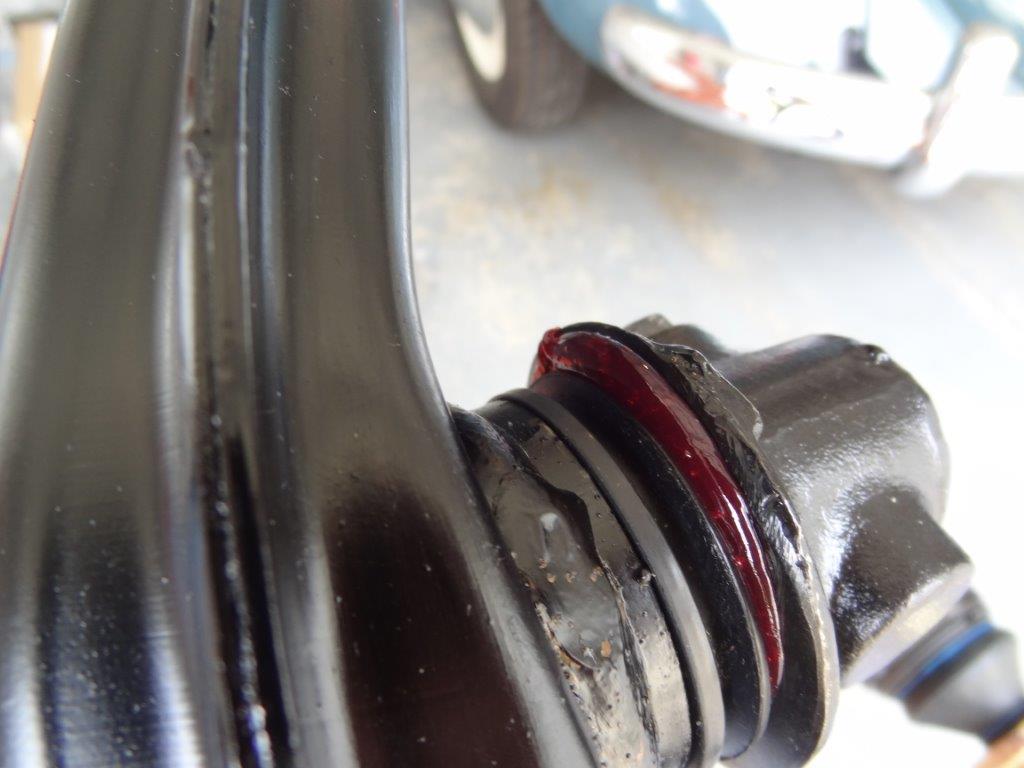
Keep pumping until a little bit leaks out of the torsion arm seal, like this:
Remove the grease gun from the zirk fitting…
Wipe grease clean. Repeat for the remaining zirk fittings.

That’s it! All done! I’m really happy with the results, and learned a lot from doing it myself. Very rewarding!
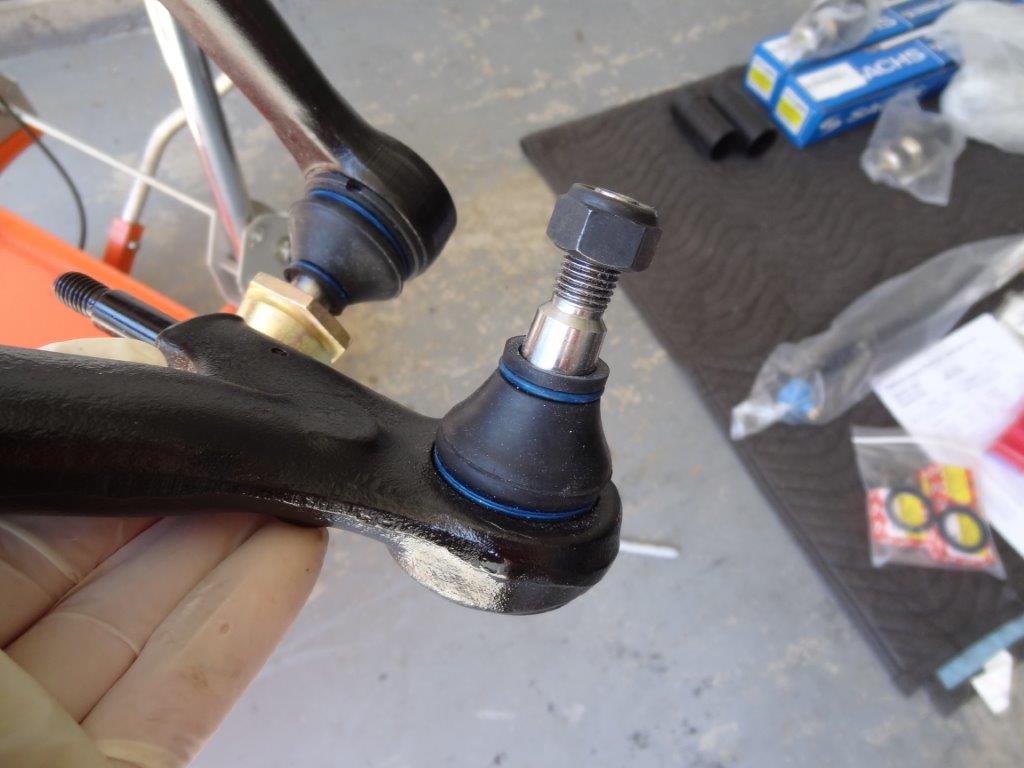
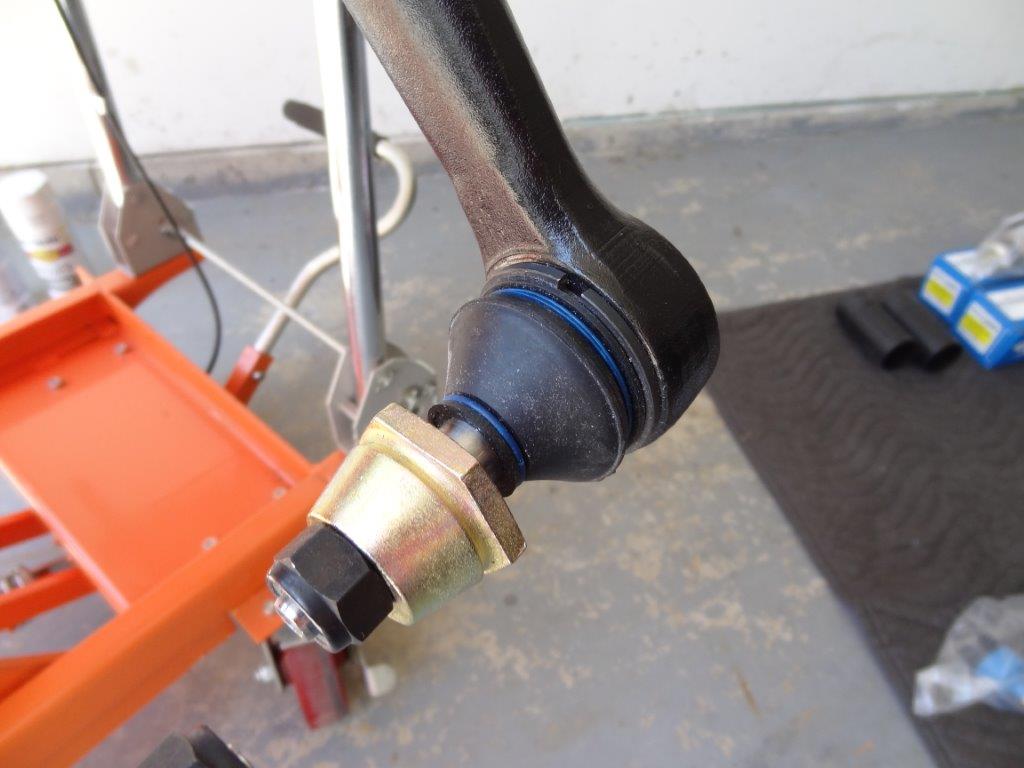
Oh, almost forgot. Look at that nice clean ball joint rubber on the trailing arms! Love new parts like that! 🙂
can you leave out 1 or 2 to soften the ride, as in street dune buggy?
Looks great and the detailing of the step by step procedure was well done, I have a 66 my self and believe I need to do the same thing, I recently put drop spindles on the front 2 1/2 in and put all new ball joints etc. the problem I am having is the front end drop down to far almost hitting the tires now so thought it may need new shocks as well so replaced them, still having the same issue, this is why I think it may be the Torrison Spring if I push up on the bug like I was trying to roll it over the bug comes up about 1″ to 1 1/2 and stays but if you put any weight such as a passenger it drops back down and does not come back up. So am I on the right track? Is it the Torsion Springs gone bad? Any help would be greatly appreciated, Thanks Andy
I am having the same issues as you Andy. I just rebuild my whole front end (and car). I got a new adjustable beam and used the springs out of my old beam from ’72. There is no body or engine in the car and when I just put my weight on it, the front and slumps down and doesn’t come back up. Then when i lift it up, it raises 1-2 inches and stays there.
I’m not sure what the issue could be, I started looking into full coilover conversion kits but hear this is not the best option. I’m thinking my issue might have came when rebuilding them if I didn’t line the spings up properly, but it seems hard to mix this up. Reading through this article, my method was very much the same. New springs may be the only repair.
Great write up, one of the very best I have seen and I just spent two years building a Ghia. Thanks very much.
Cheers Mike
Great write up and the pictures were very helpful, too! I’m getting ready to change the beam on my ’66 Beetle. I was wondering about the tape trick you mentioned to get the leaves to stay together as they pass through the hole in the center of the beam. Would it really cause any harm to simply let the tape remain in the tube (as opposed to trying to retrieve it)? I would think that over time with all the grease that’s been pumped into the tubes, the tape would simply break down. Also, do you think it would be helpful if the beam was placed vertically on the floor and then the leaves were inserted that way? I’m just wondering if a vertical position would take out any sag in the leaves as they get closer to the center hole.
sounds like you need to add shims to the top of the beam. this will raise the body approx 1/16″ back up per shim.
Any trick to getting the trailing arms seated ALL the way on to the ends of the torsion leaf spring bundles?